
Building Keyboards
What better way to spend Xmas than to build yourself a new keyboard?
I have been using Kinesis Advantage keyboards at home and work for a couple of years now. They are great keyboards, much more comfortable, the layout of the keys in columns is a much more sensible design for touch-typing and the thumb keys are incredible.
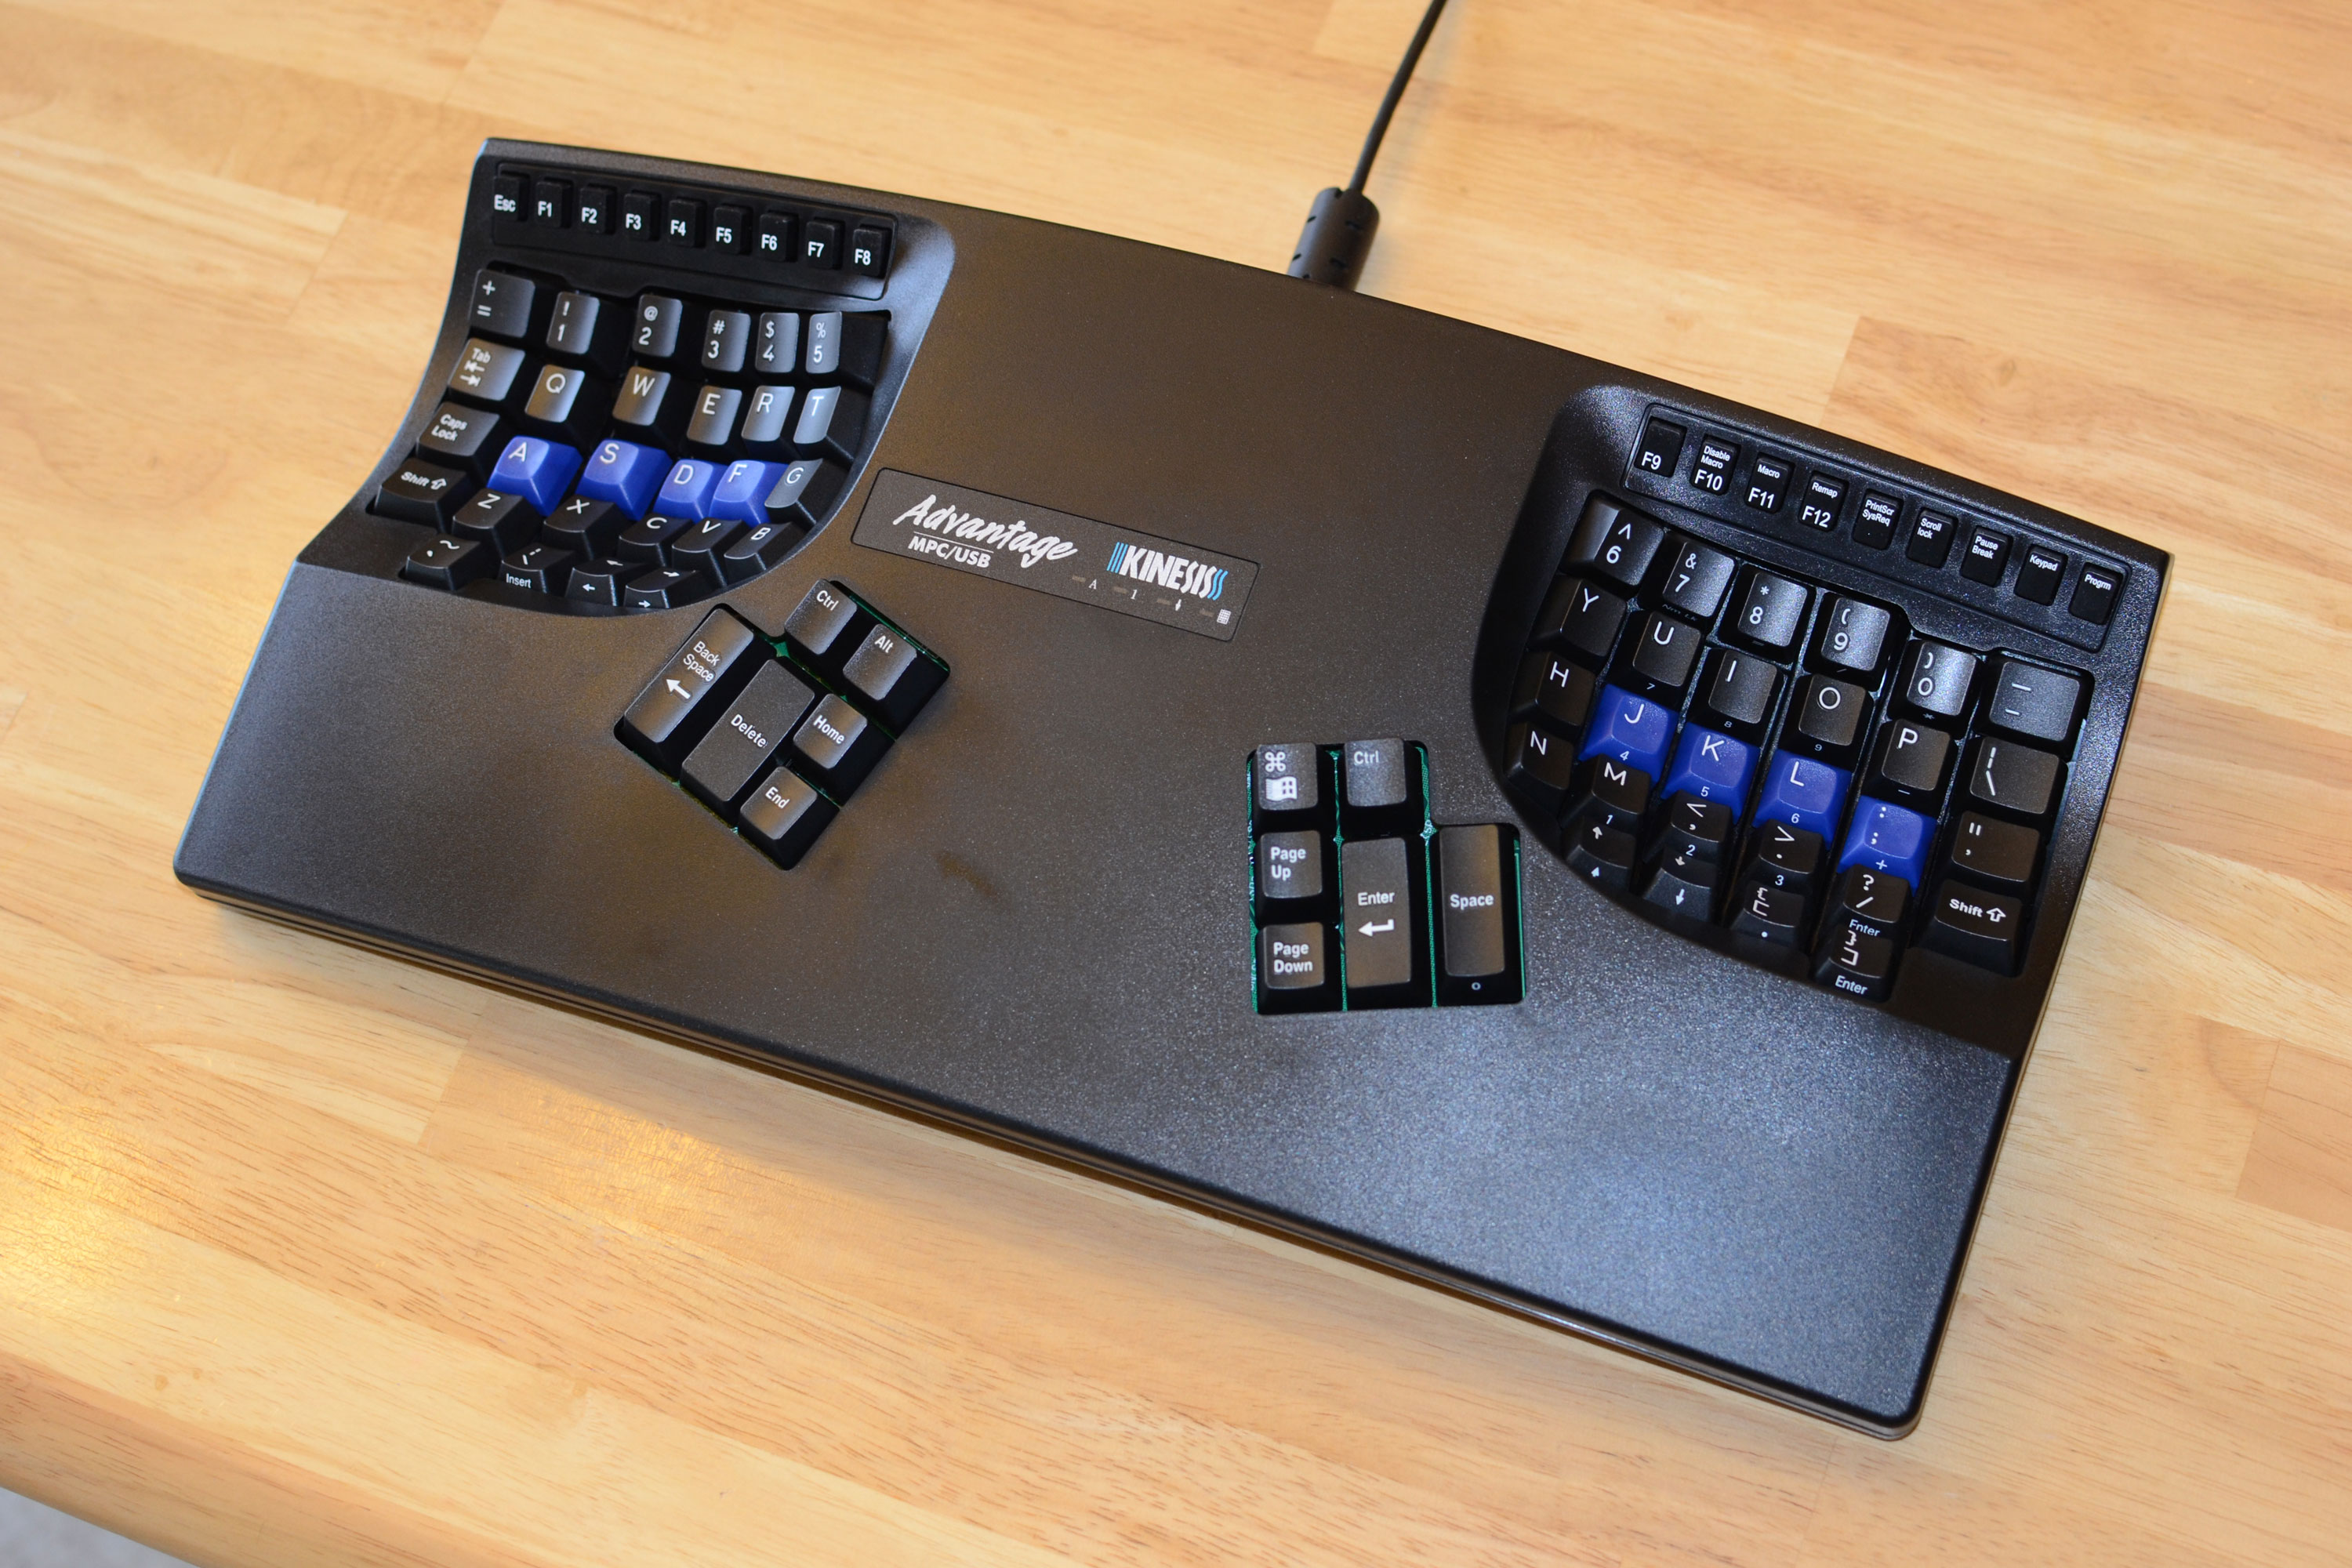
But every time I travel to another office, take my laptop on vacation with me or just sit in the sitting room with my laptop instead of going upstairs to my office, I have to use a traditional keyboard because the Kinesis keyboards are just too big to carry around.
But there is a laser-cutter at work. And there are many designs online for building your own keyboard. There is the Atreus, the Planck, the Ergodox and probably about 50 other designs out there.
The first keyboard (Spring 2015)
So last spring, I built my first keyboard. I downloaded the design files for the Atreus and built this 42-keyed beauty.
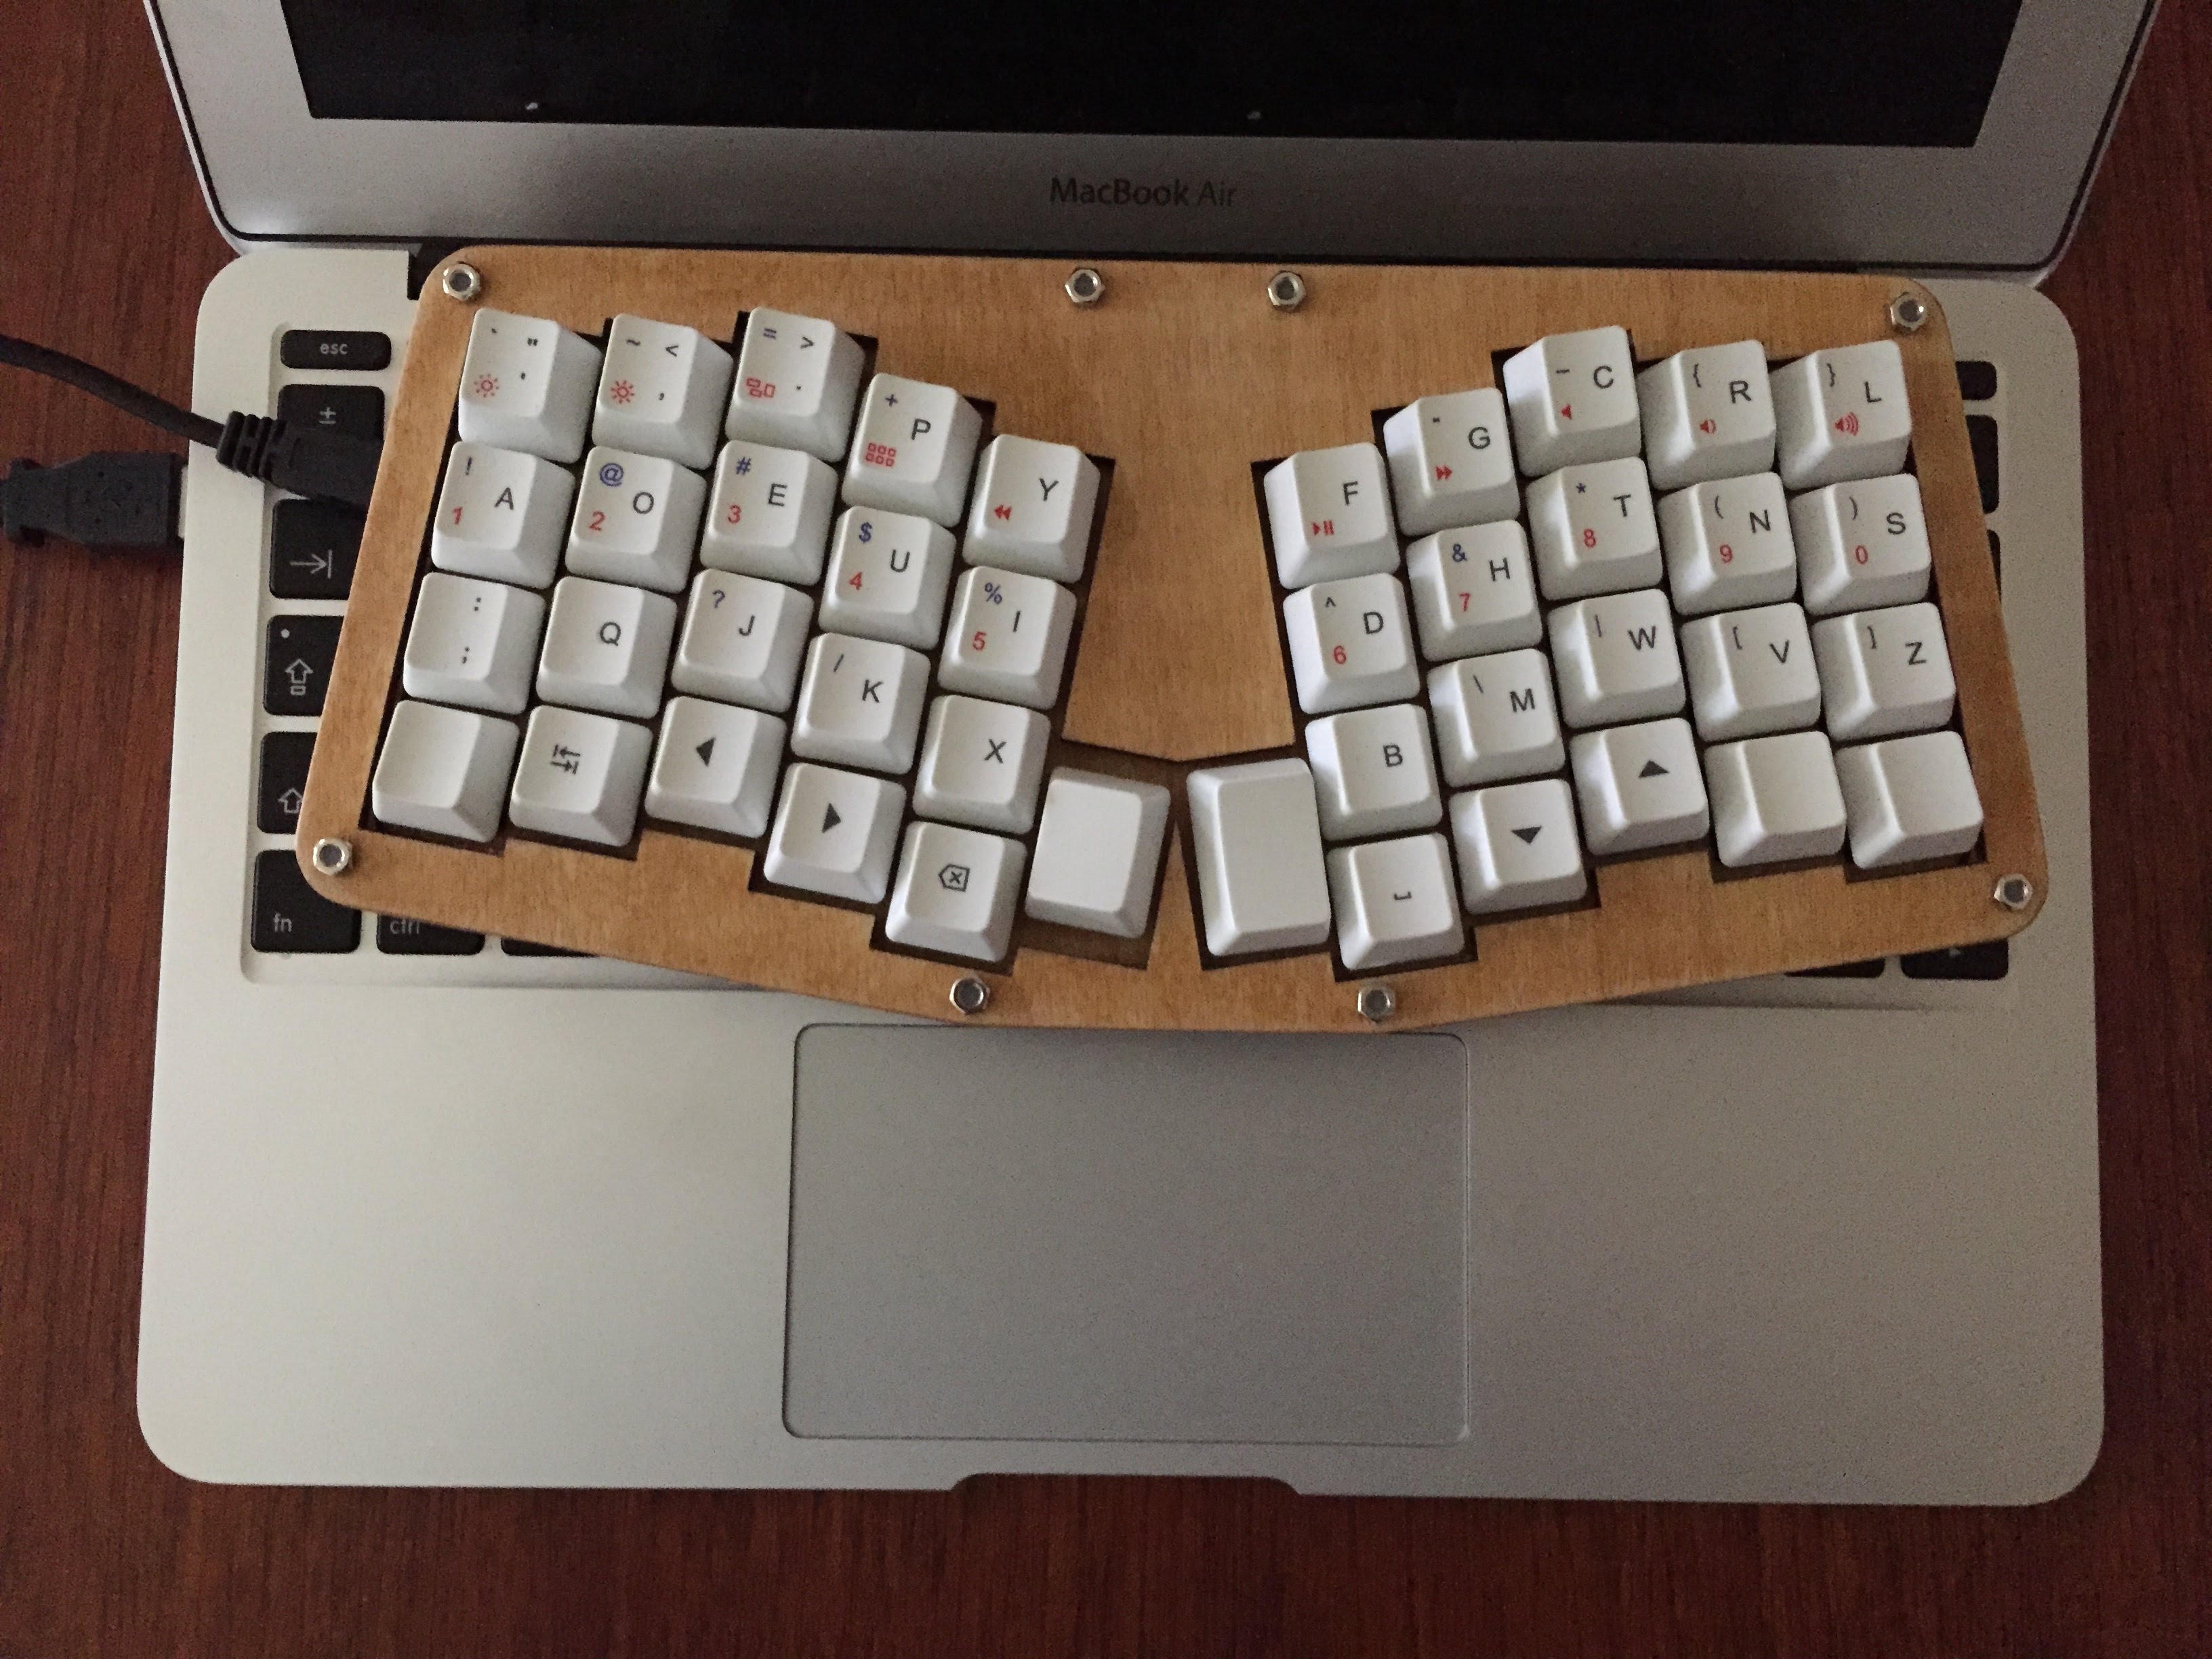
What I love about this keyboard is that it is really small, the angle between the hand clusters is pretty good, the keys are great to type on and I have my own custom printed keys. The key layout is basic Dvorak but, because there are so few keys, you have to use modifier keys to get access to numbers, punctuation, etc. But, despite having an ortholinear layout, the keyboard is hard to touch-type on because every time you need punctuation, numbers, etc. your fingers leave the home row and you have to feel your way back before you can resume typing.
So, reluctantly, I realised that 42 was not the answer - I needed more keys.
The second keyboard (Xmas 2015)
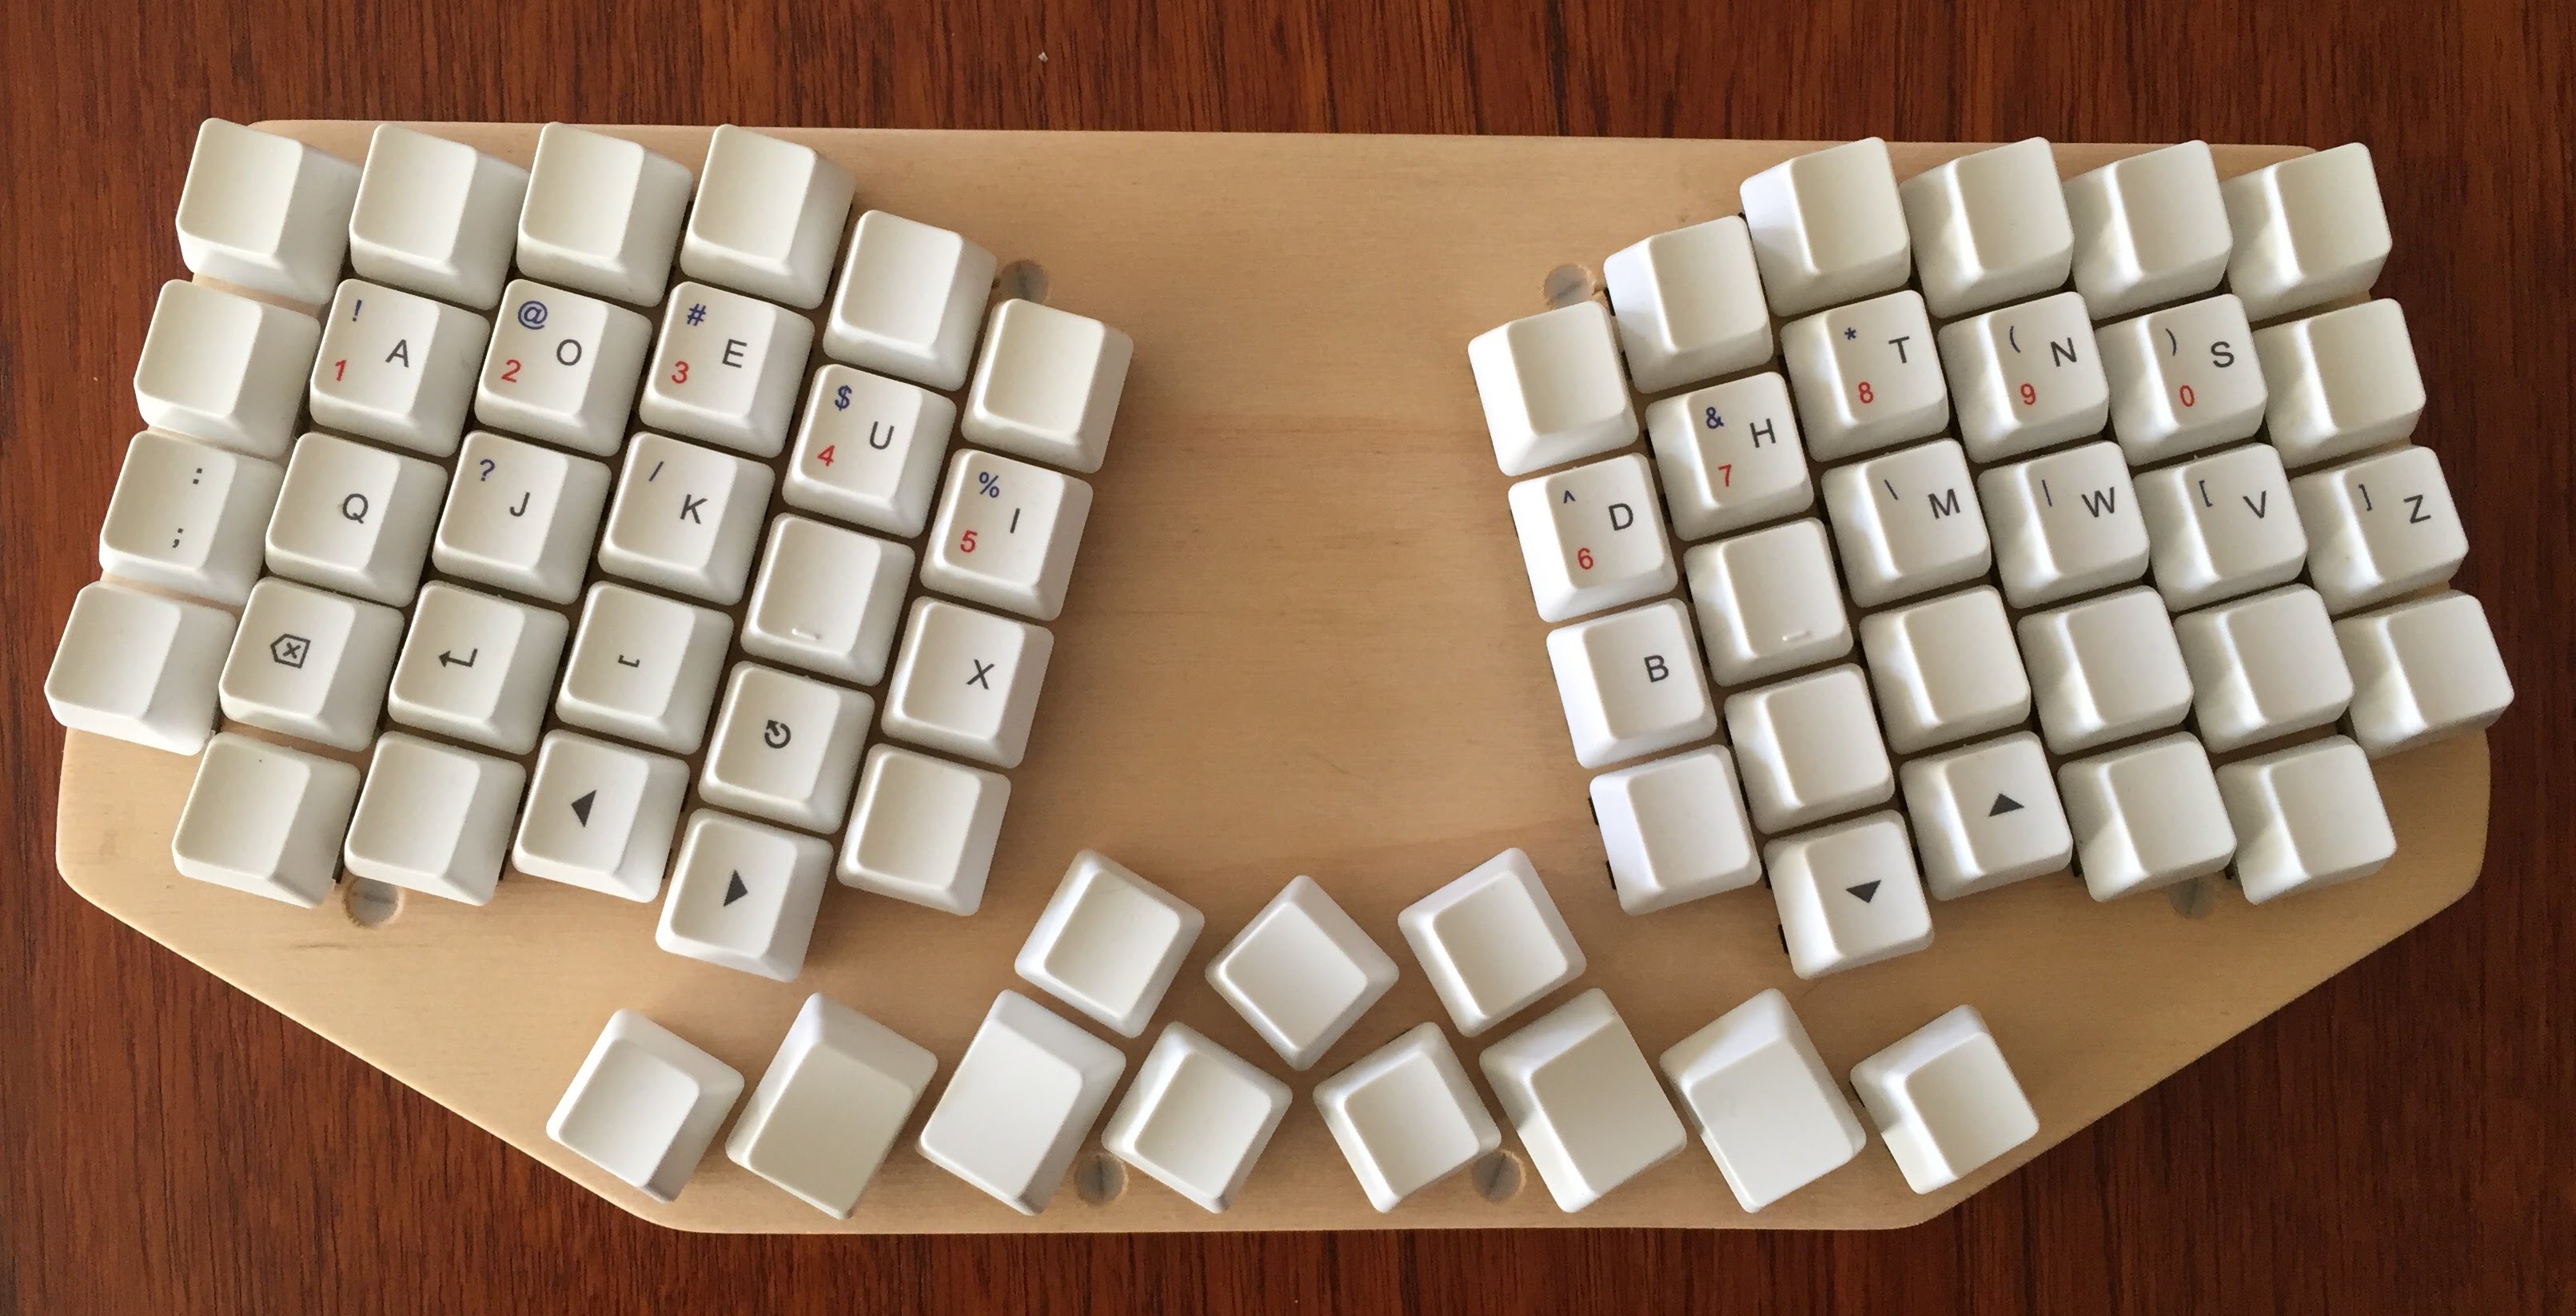
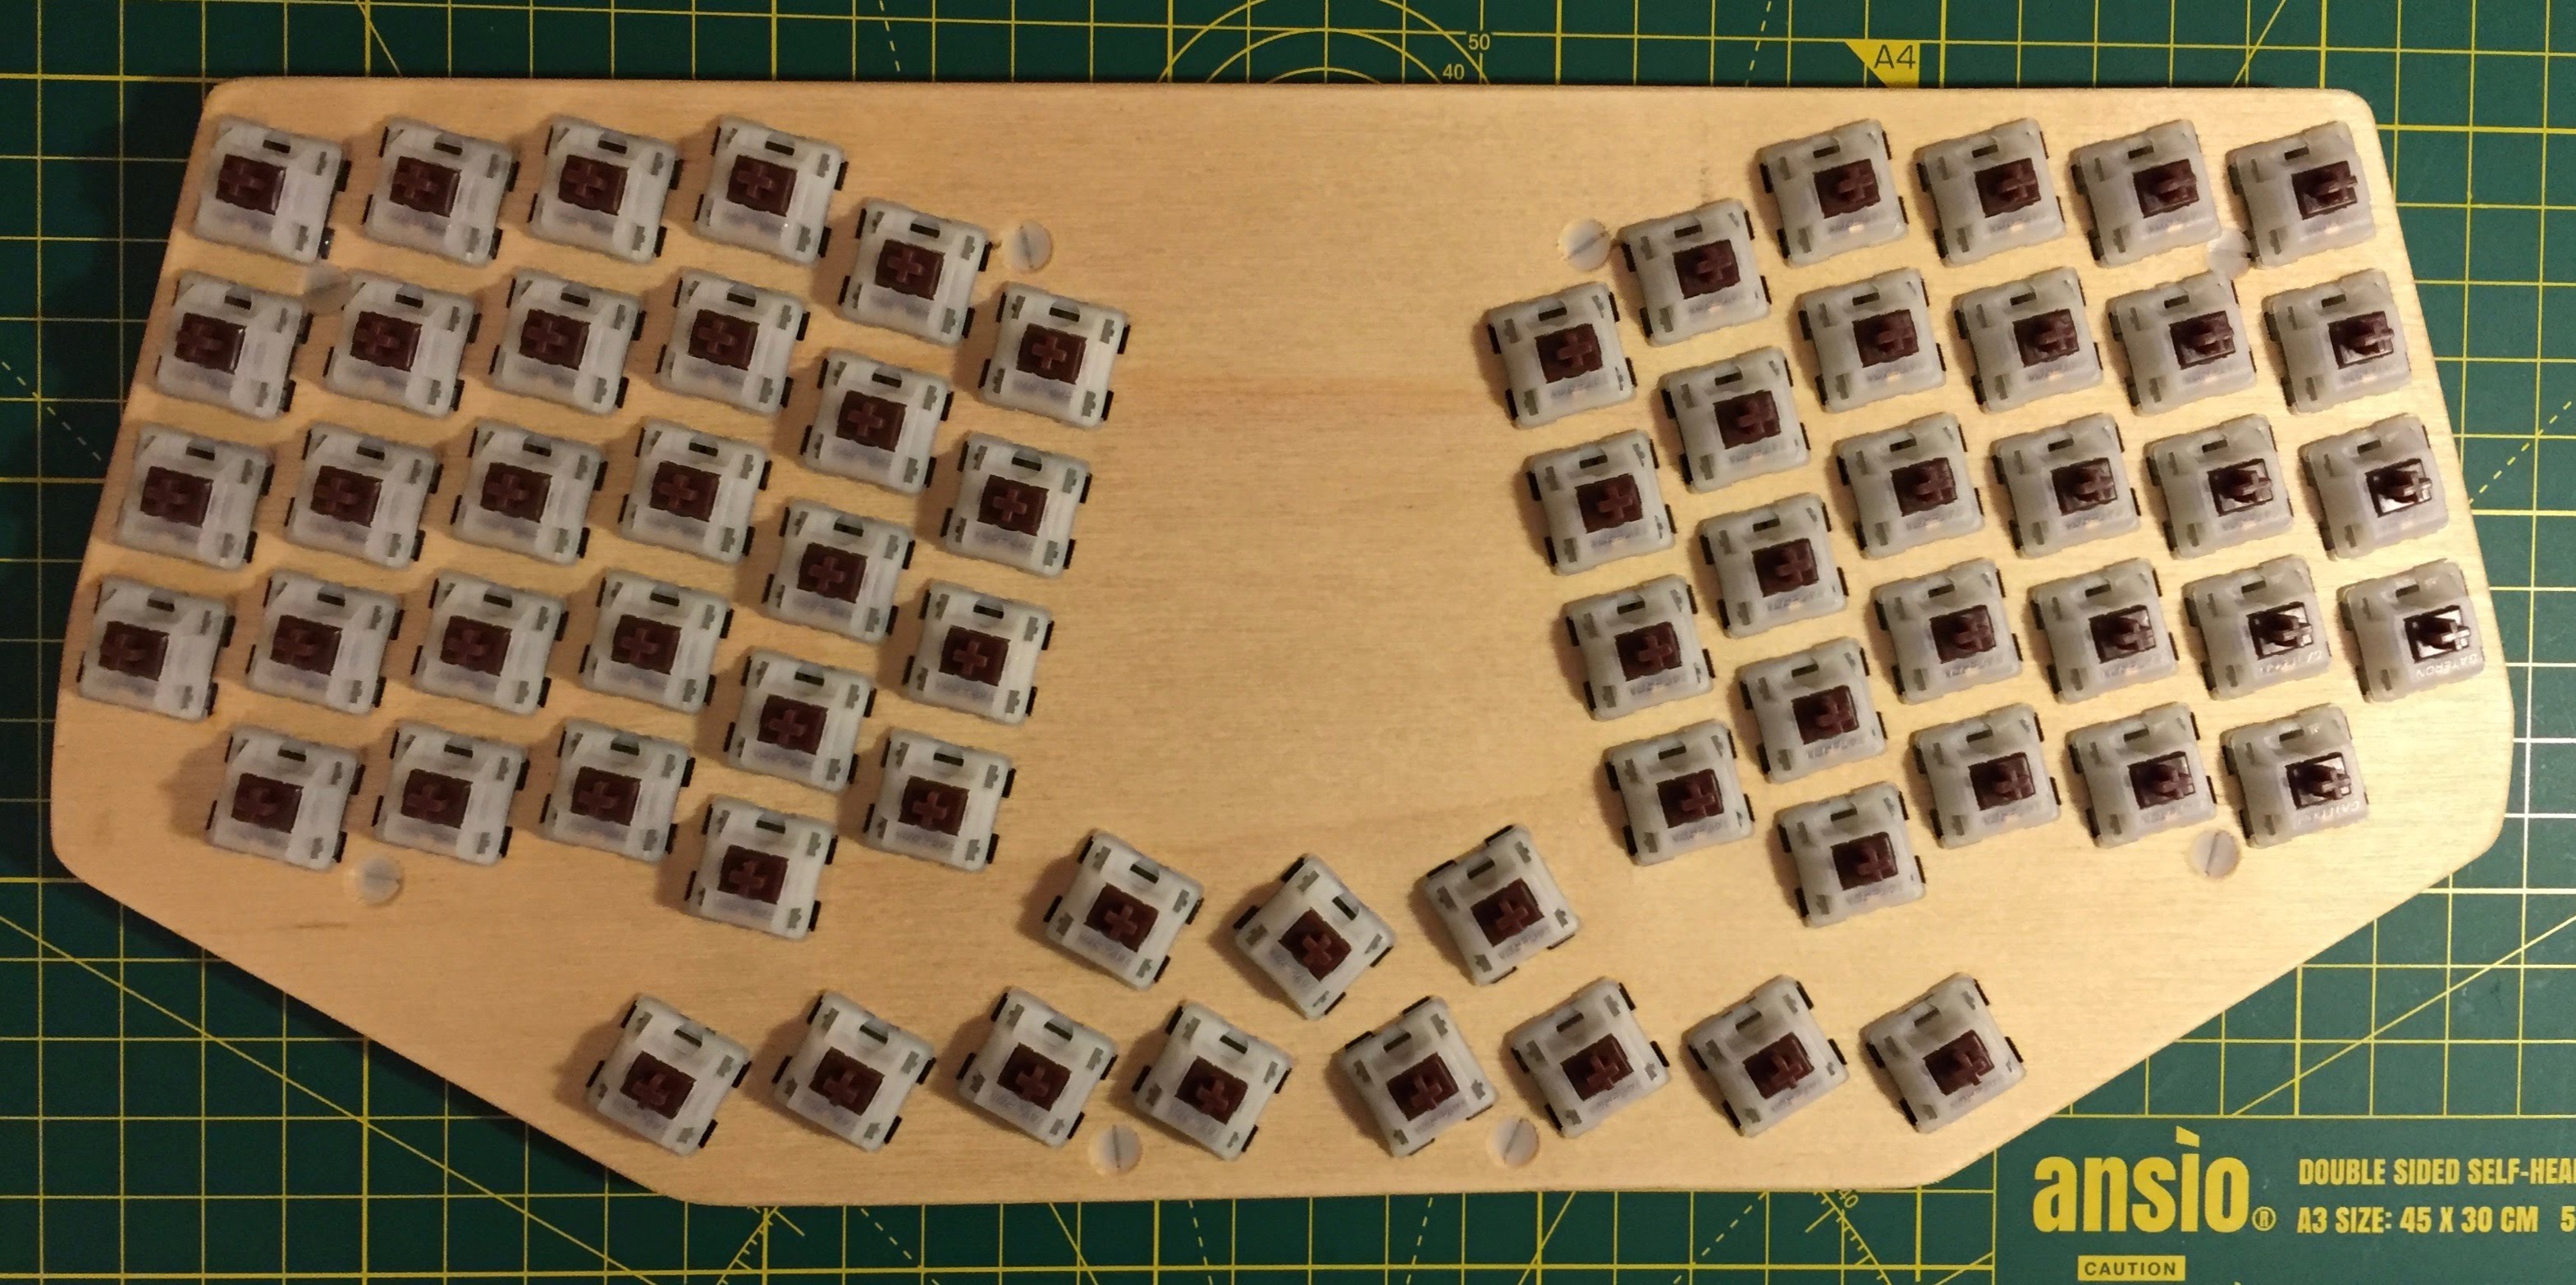
For my second keyboard, I created my own design. I added a number row, an extra column of pinky keys, and a lot more thumb keys. I increased the gap between the hand clusters, increased the angle of the hand clusters but kept the size down by reducing the bezel to a millimetre or two.
I also avoided the mistake from the last time of ordering the custom keycaps before trying the keyboard. So the reason the key layout looks bizarre is that I am using keys cannibalised from the first keyboard - and the printing doesn’t match the key layout.
Construction
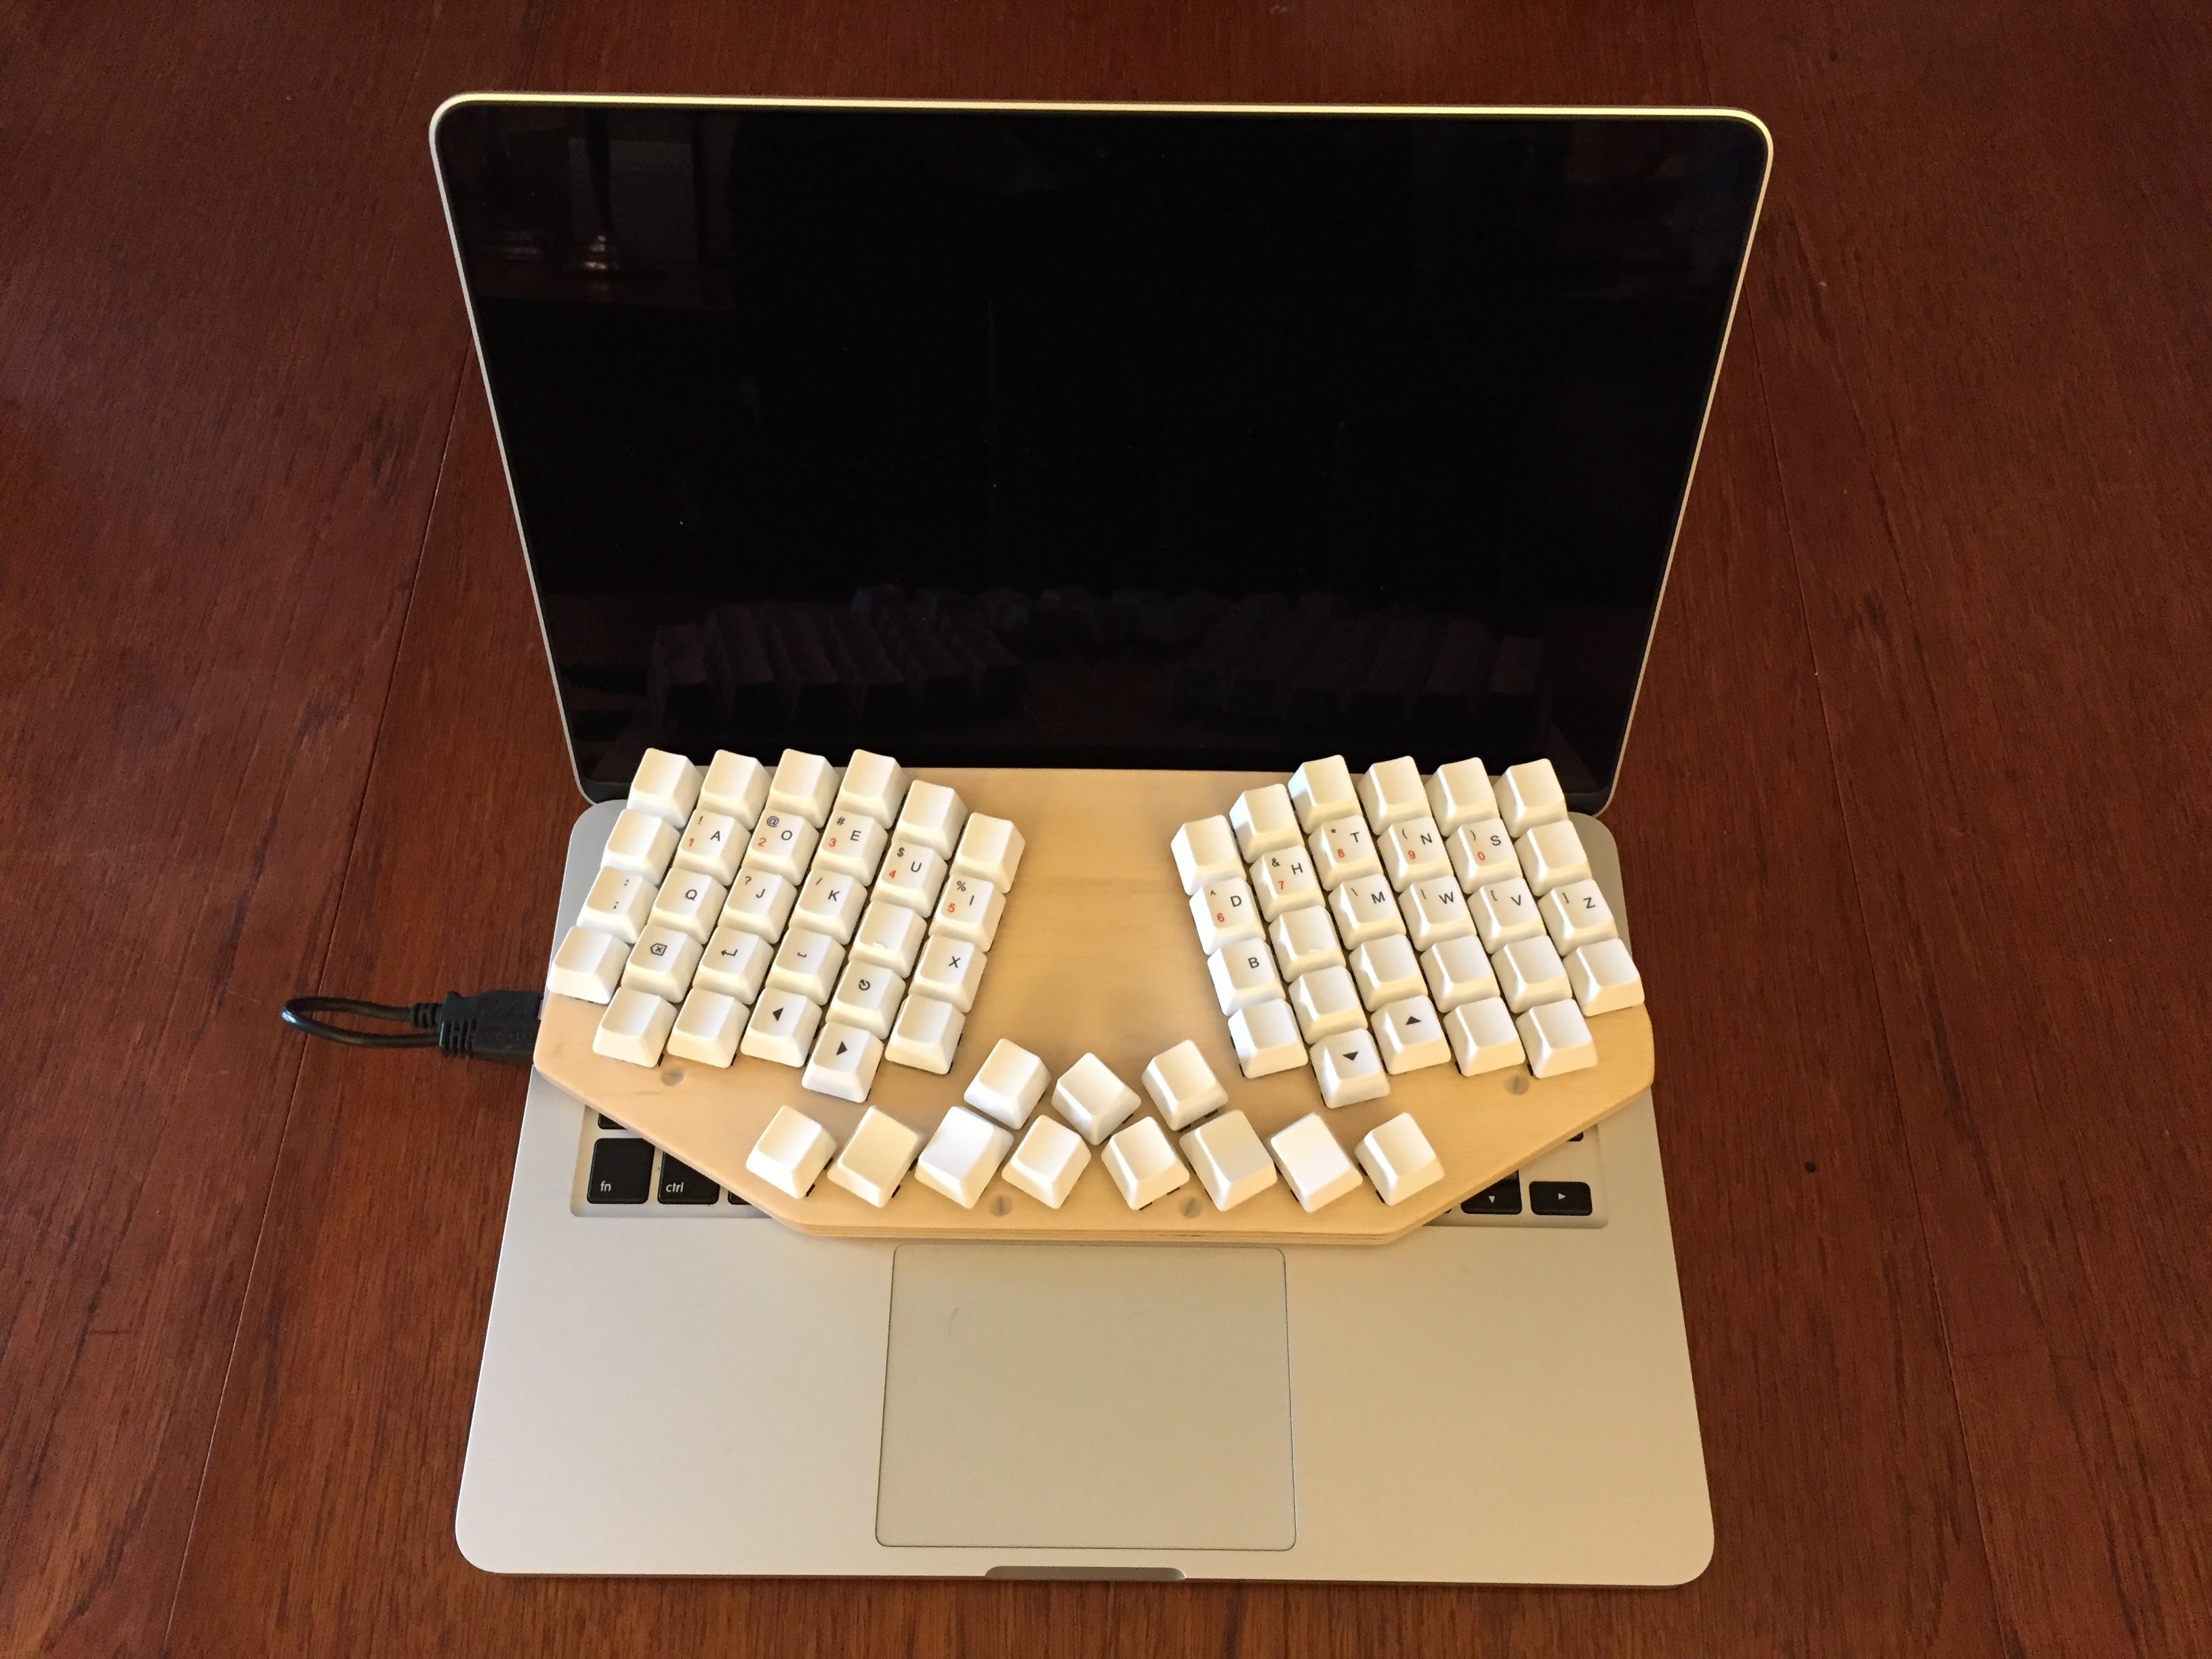
First of all, I spent ages futzing with InkScape to create a design I liked. I dragged keys around, printed it out, cut the outline off and laid it on top of my laptop, and repeated that many times before I had a design I liked. One of the bits I really struggled with was to avoid overlapping the touchpad with the thumb keys - some designs added “fangs” hanging down either side of the touchpad but those were hard to use.
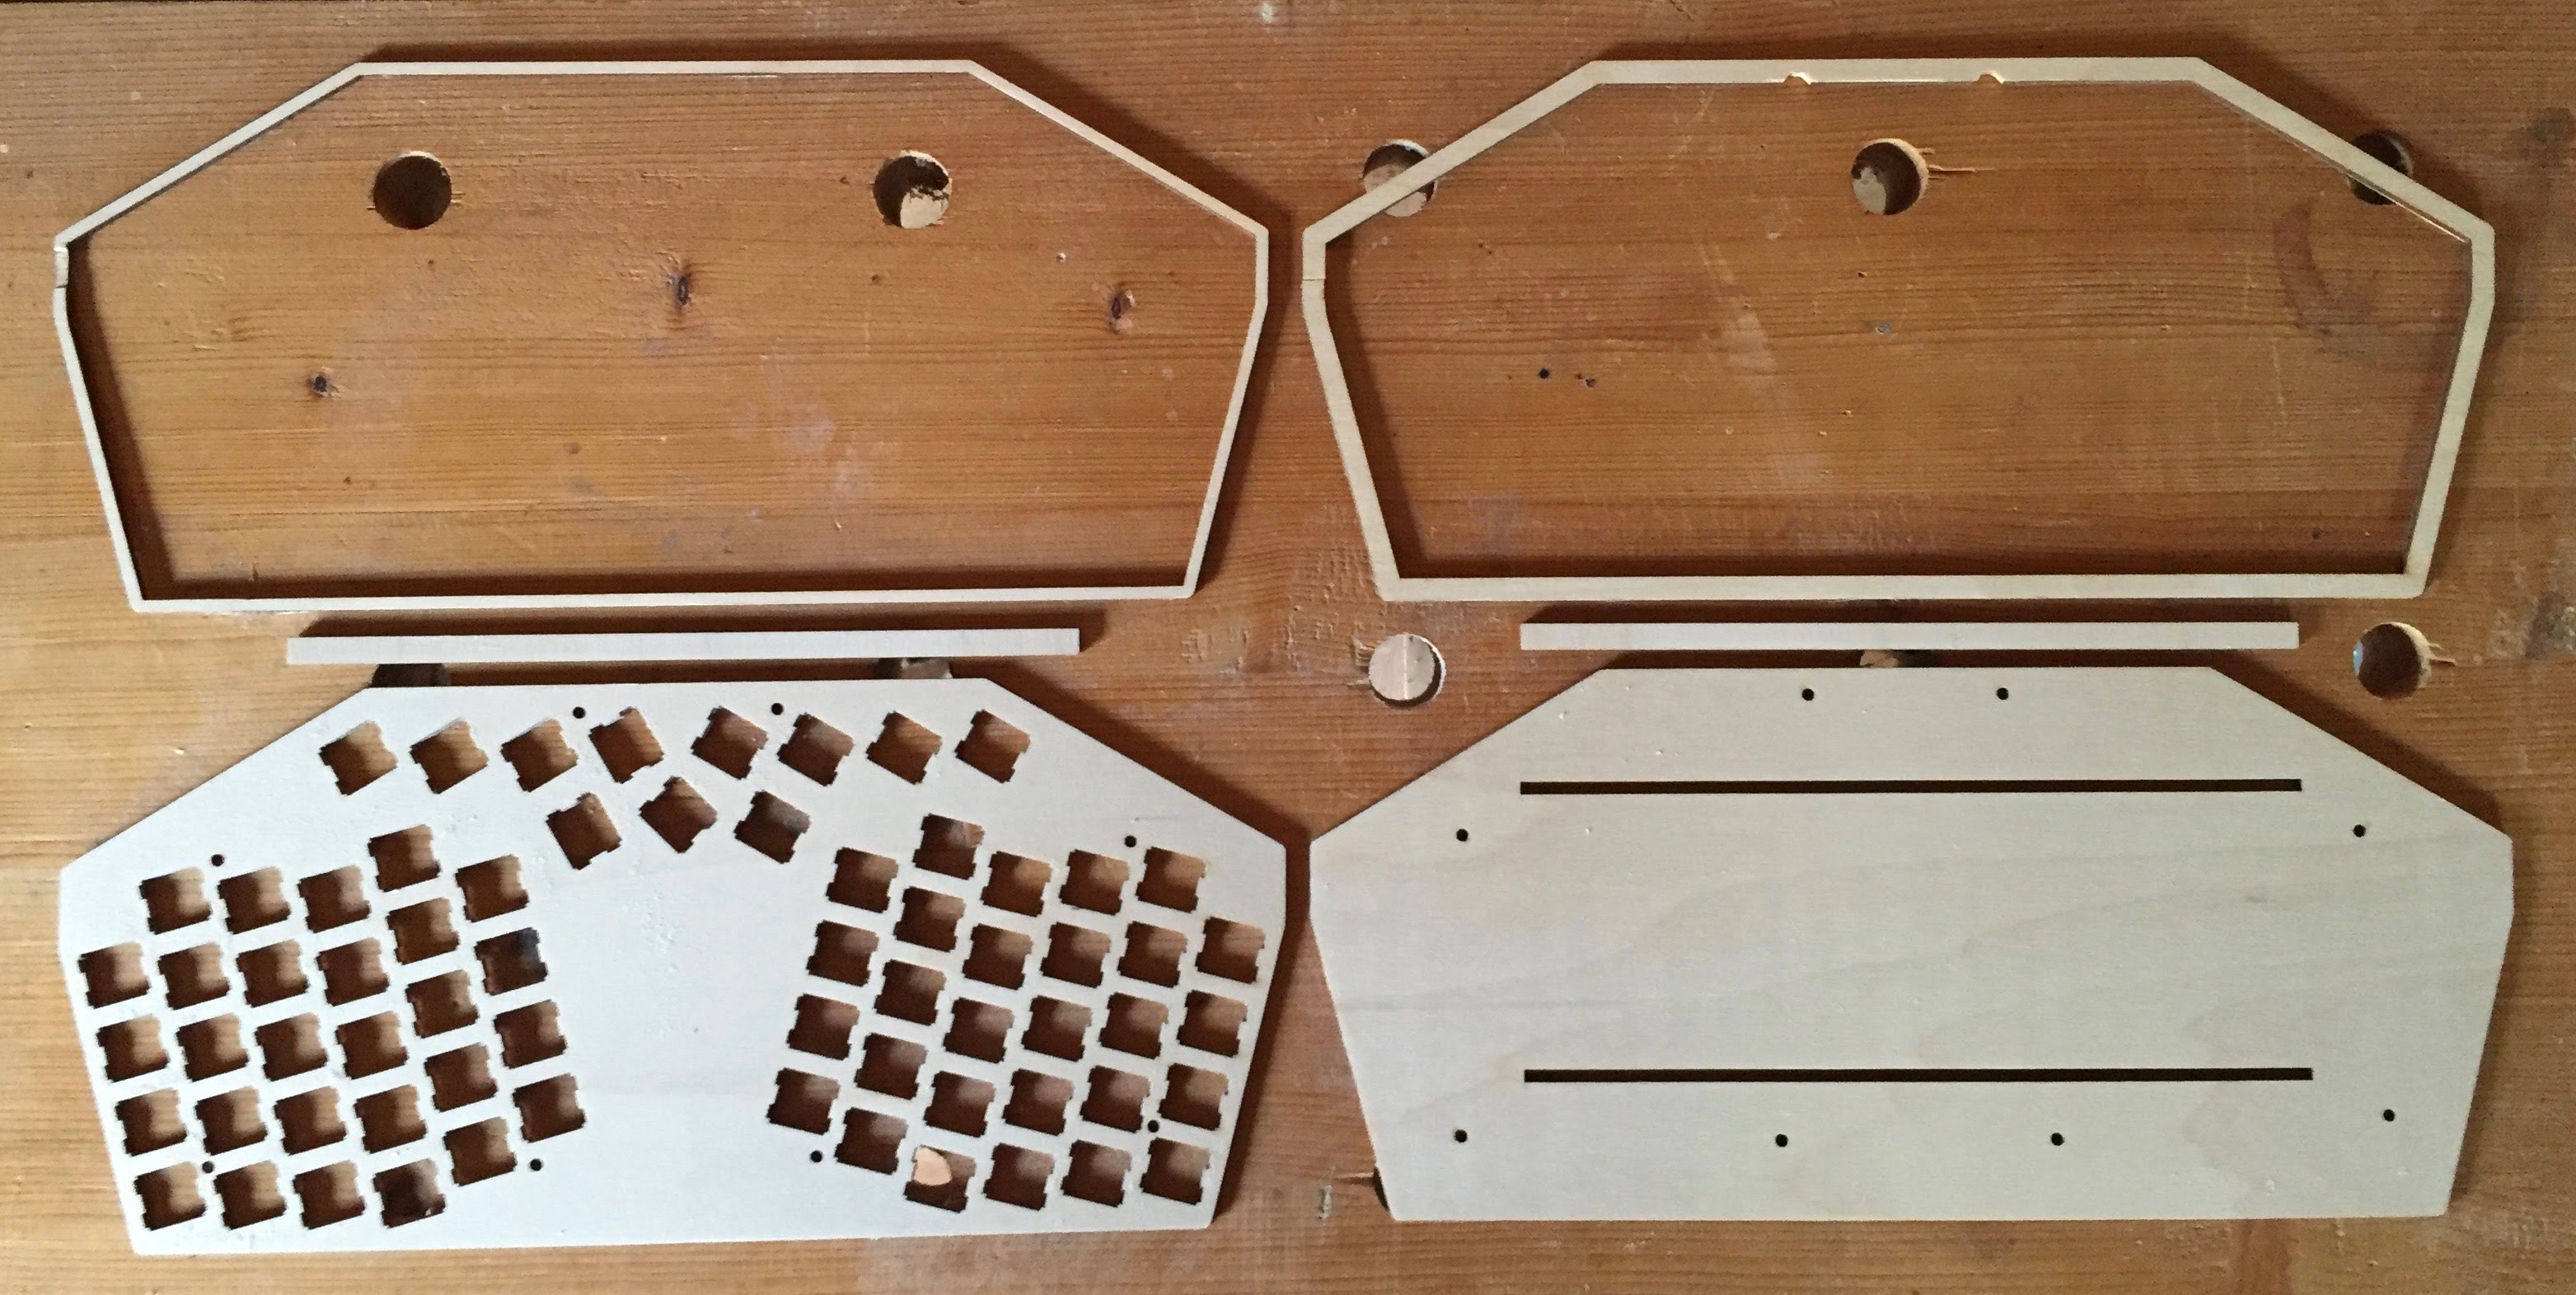
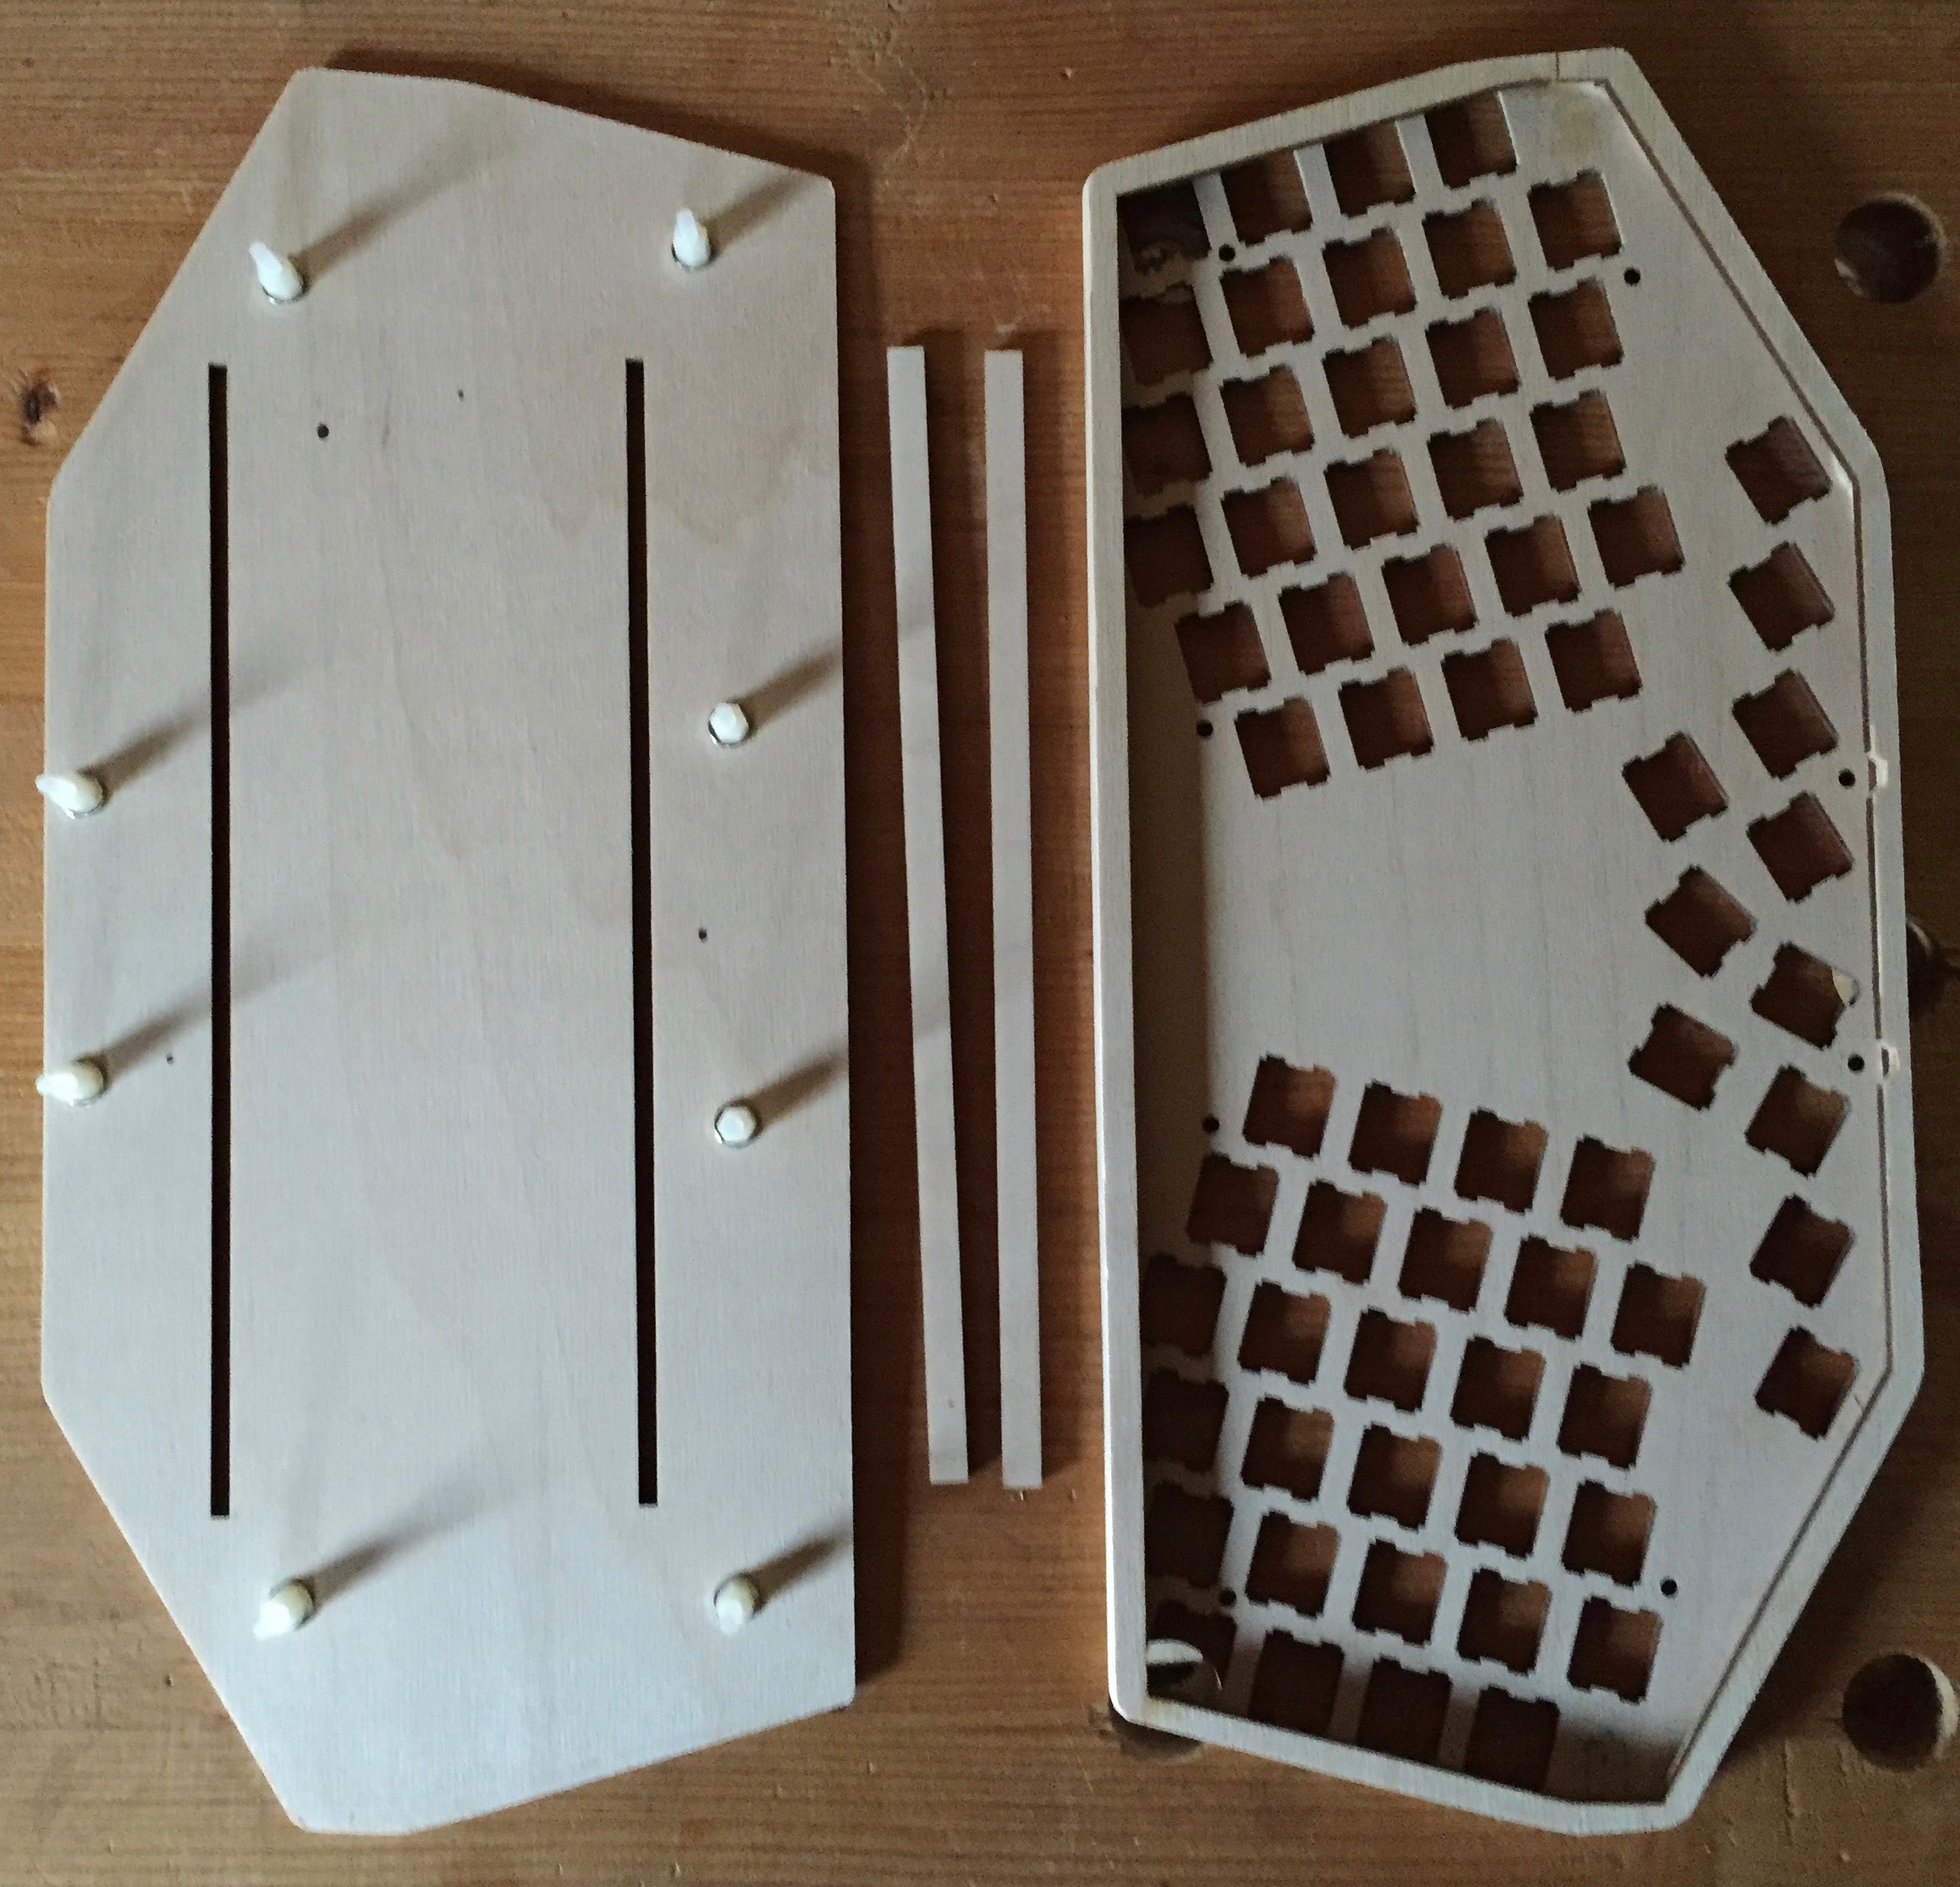
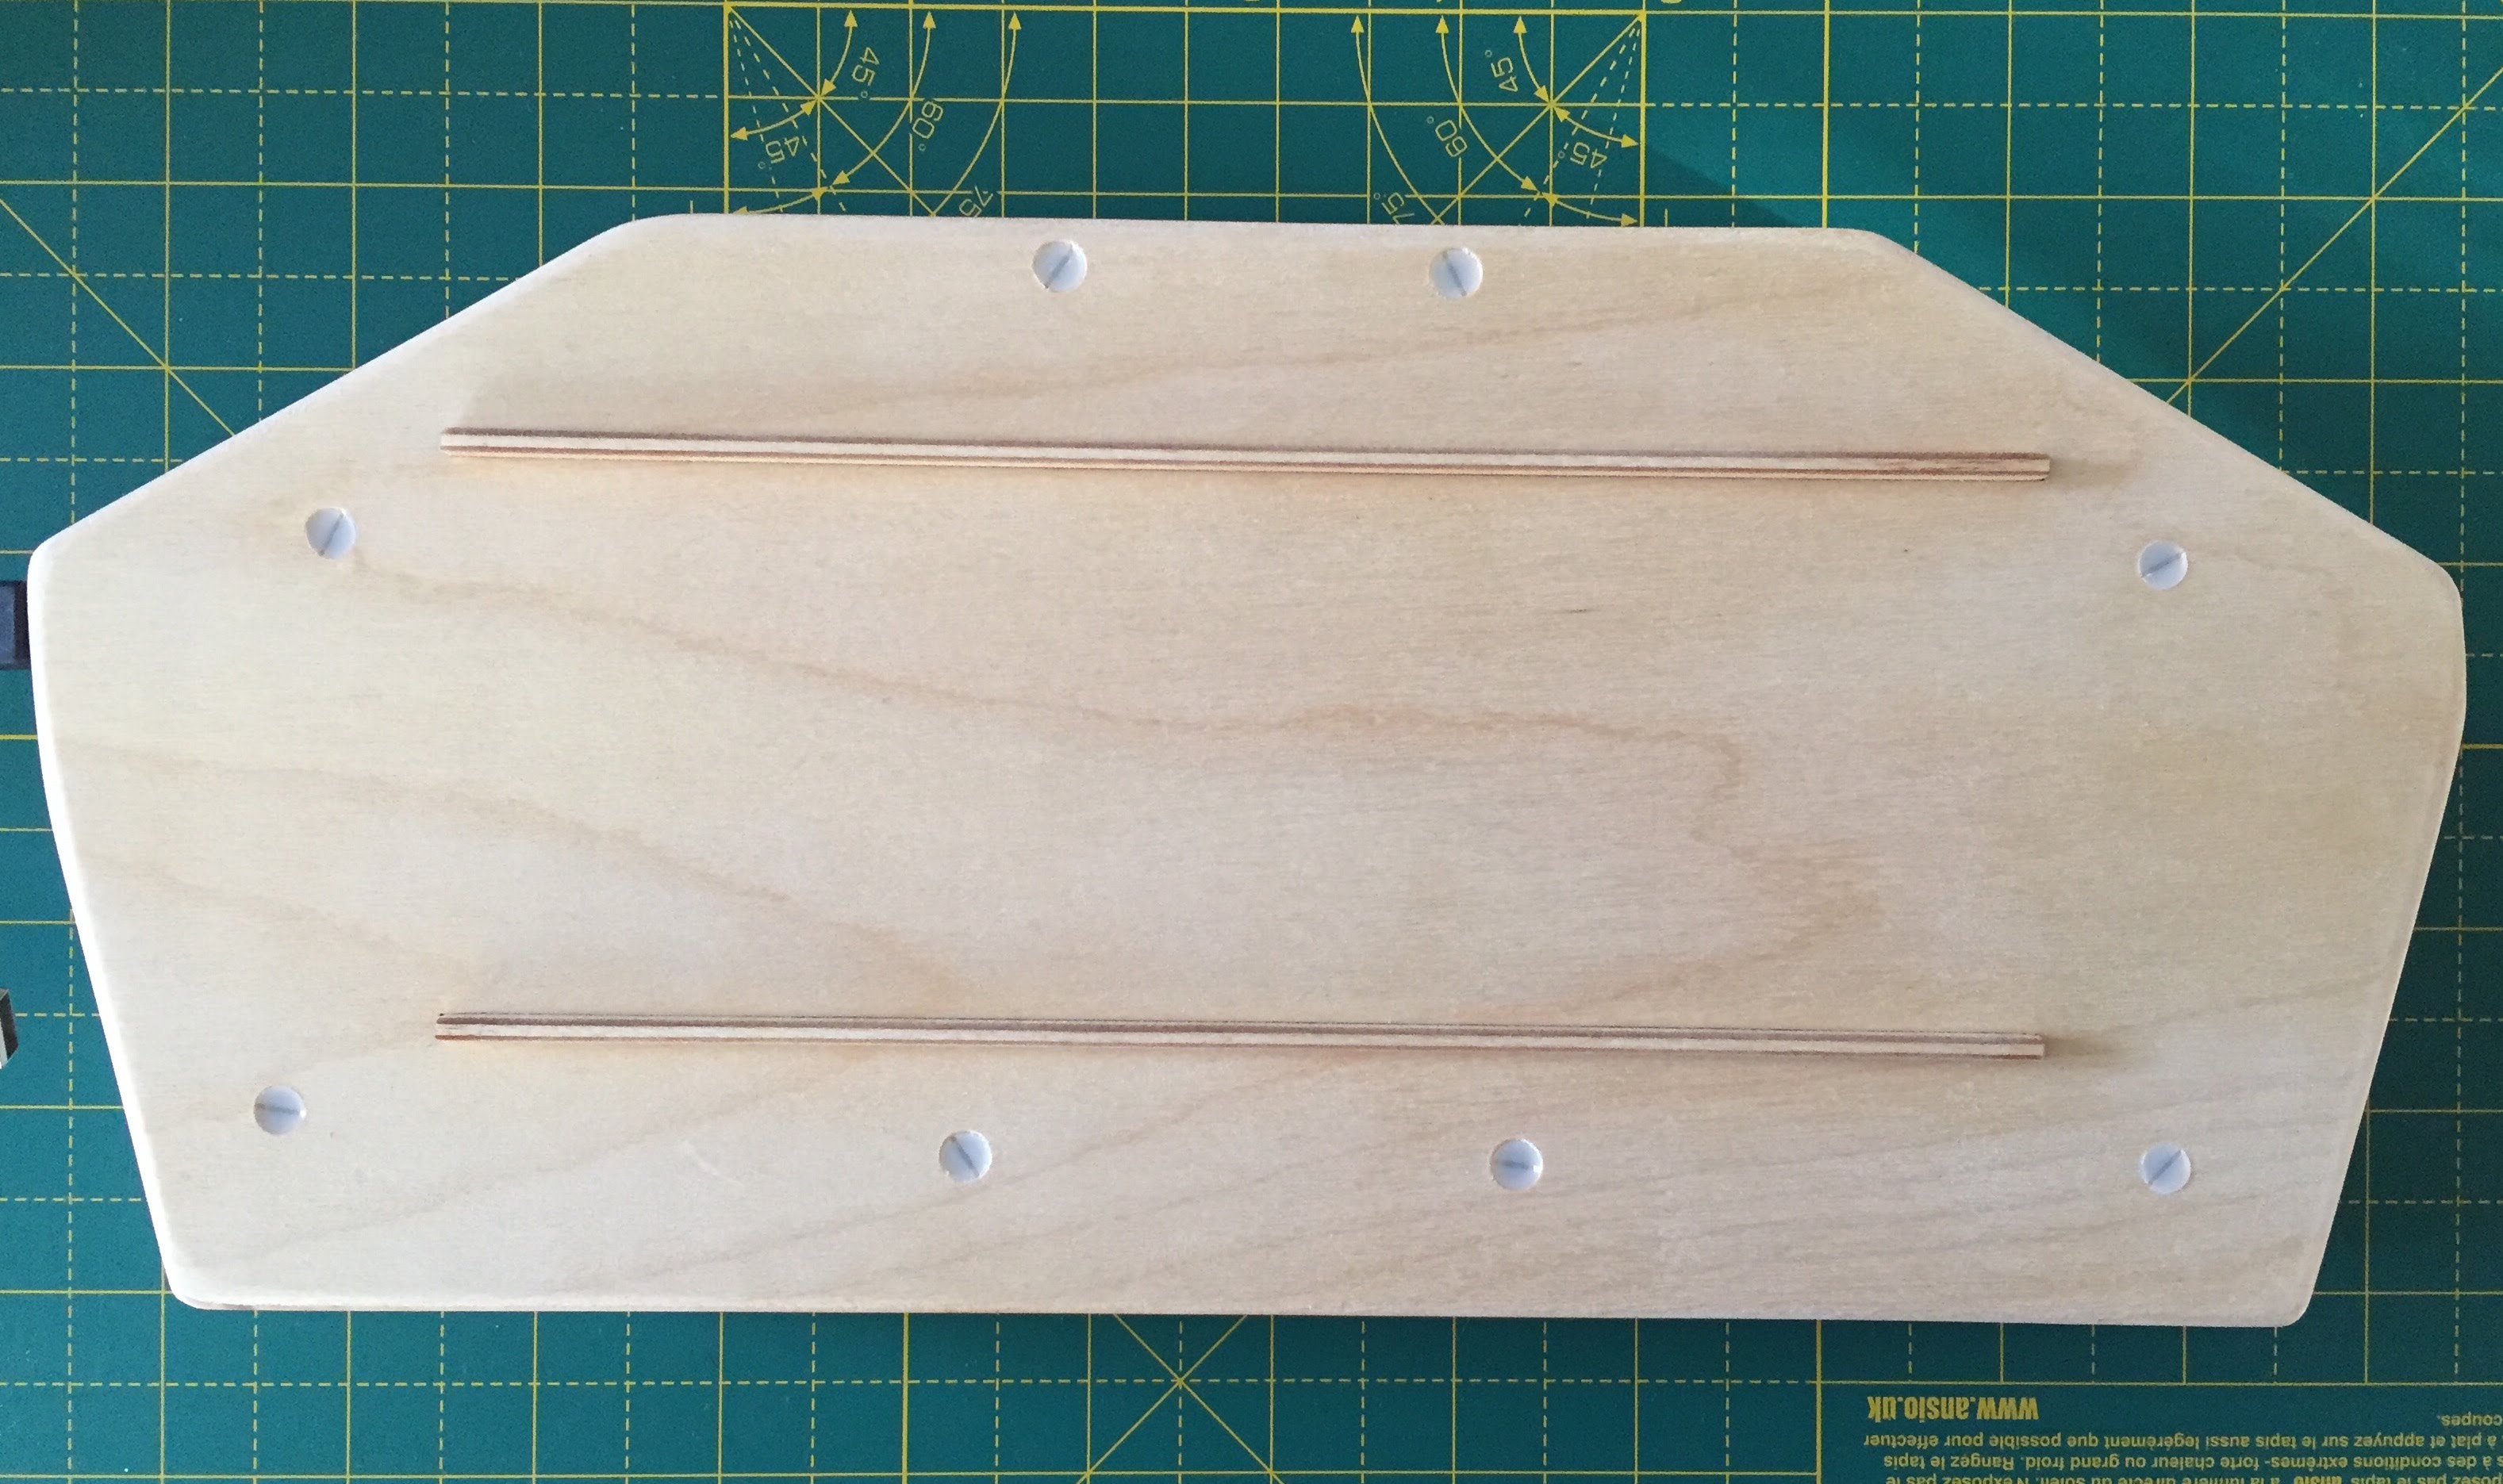
Eventually, I settled on the following design consisting of a keyboard plate, two side-walls and a bottom plate. The slots in the base layer and the thin, straight pieces are part of how the keyboard sits on the laptop - more later.
(If you look closely at the top two parts, you can see that these have been “edited” slightly with scalpel and fine saw to make space for adding the USB and audio connectors and to make space for the spacer bars that will hold it all together.)
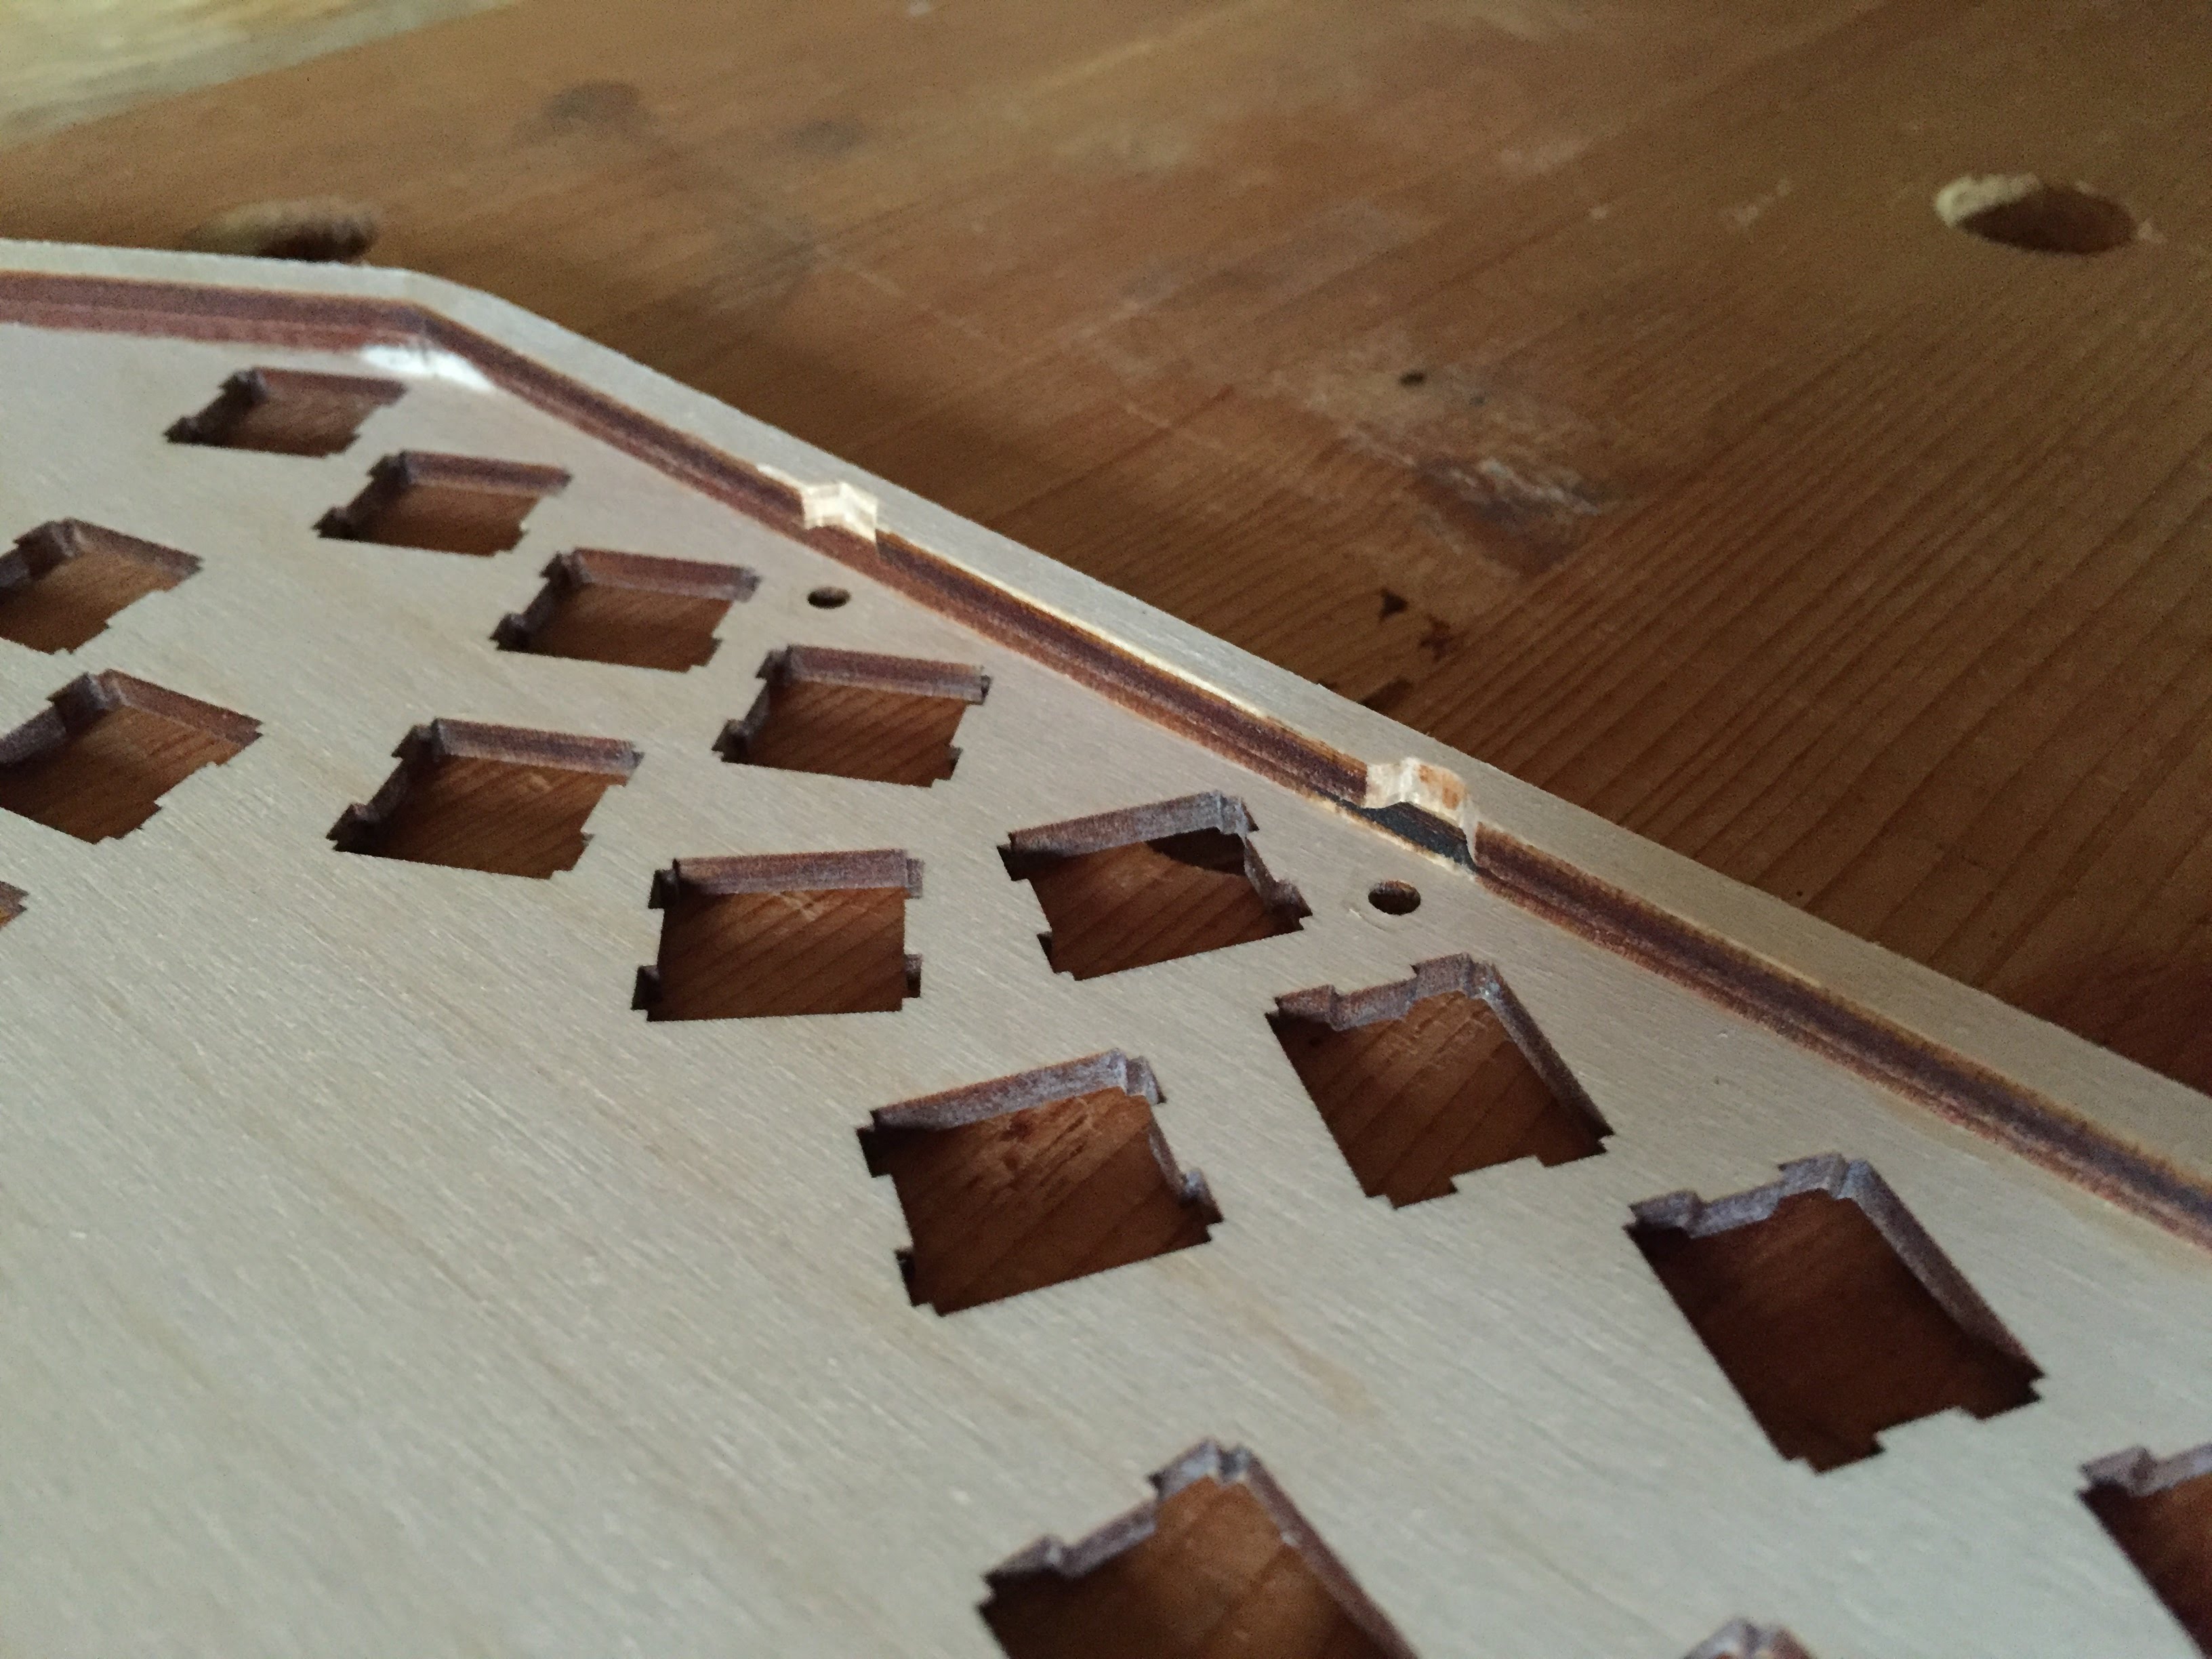
The original keyboard consisted of 5 layers held together by bolts - but I didn’t like the aesthetics and, with the reduced bezel size there was no space for them so, instead I glued the top three layers together with wood glue. In the photo of the main parts, you can see that the two “wall layers” are of different widths - space is so tight to fit the keys that I have to make the topmost layer 3mm wide while the other one is 6mm wide. If you look closely, you can just see the overhang in this closeup of the cutouts for the spacers.
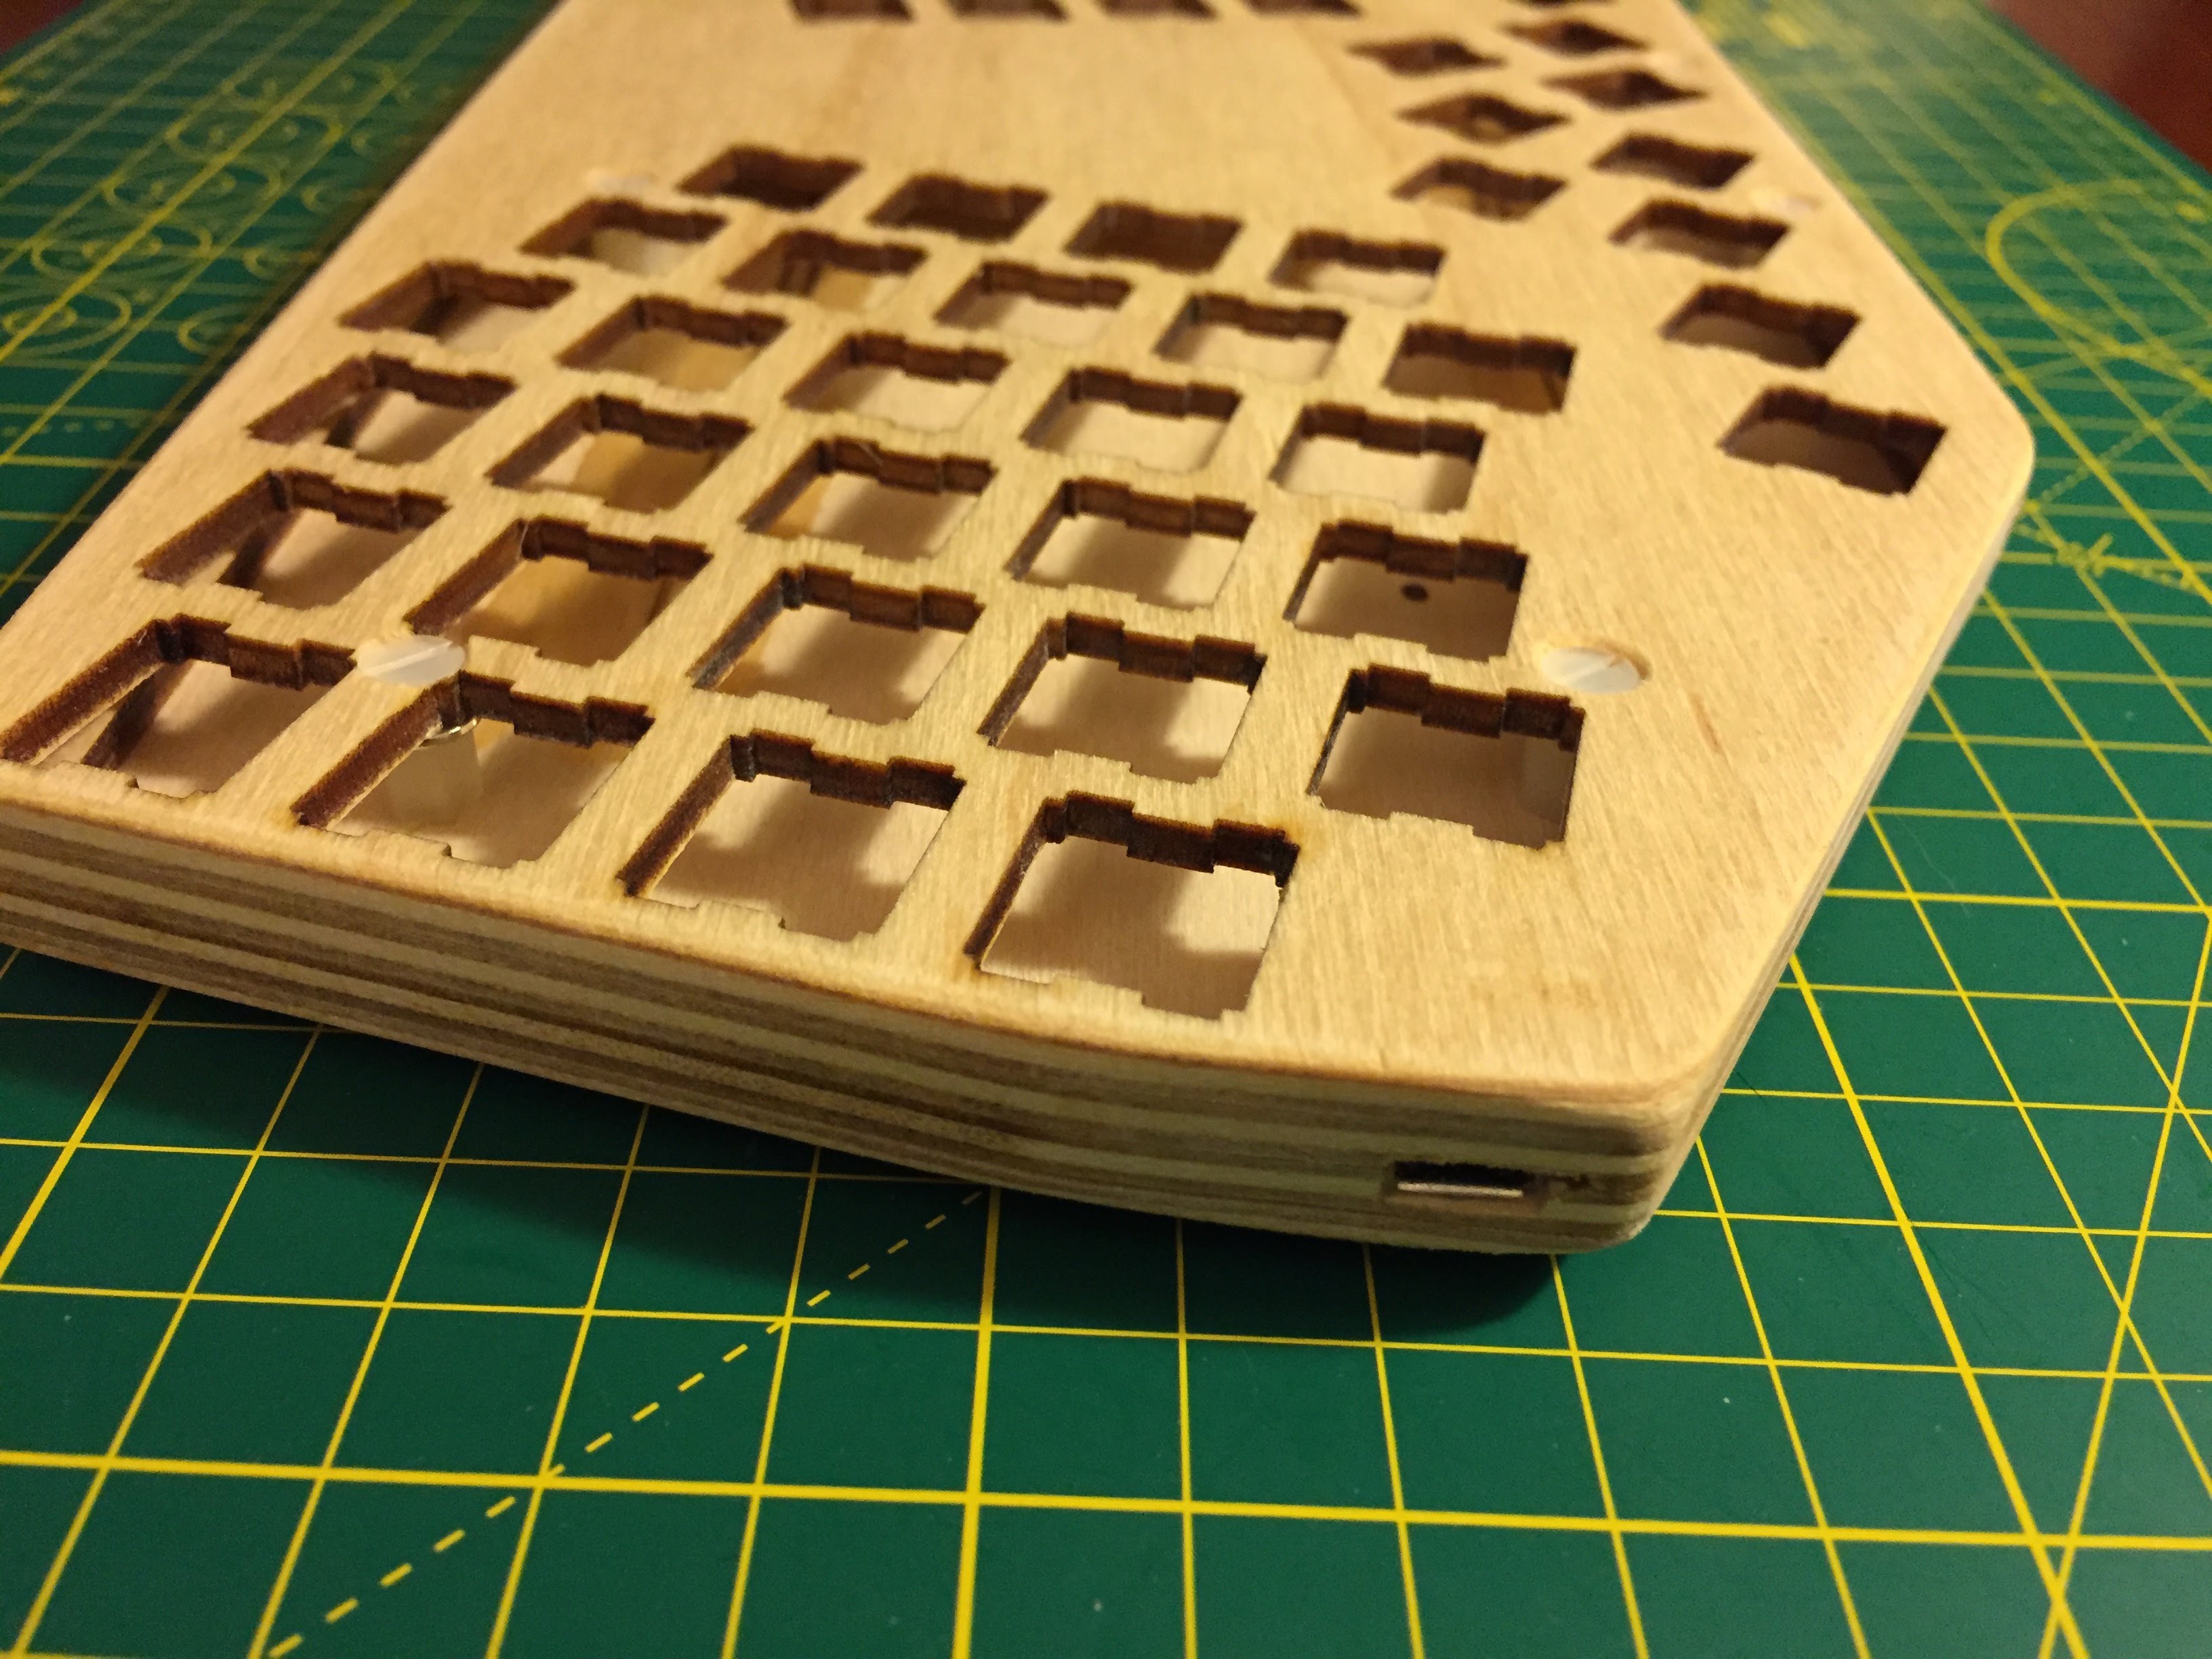
And here it is, all glued up with the nylon spacers in place.
Once it was glued up and bolted together, I took the sander to it and removed all the charred wood from the edges and rounded all the edges. Then I epoxied in the USB connector, the audio connector and the keyboard slots, countersunk the screw heads and added a layer of shellac.
And I epoxied a couple of thin strips into some channels cut out of the bottom layer of the case.
When you sit the keyboard on a Mac laptop, these strips fit between the rows on the builtin Mac keyboard and prevents the keyboard from pressing down on the builtin keys. They also hold the keyboard nice and straight on the Mac.
The switches I used are Gateron brown switches. These are a cheap clone of the Cherry brown switches I used in my first keyboard.
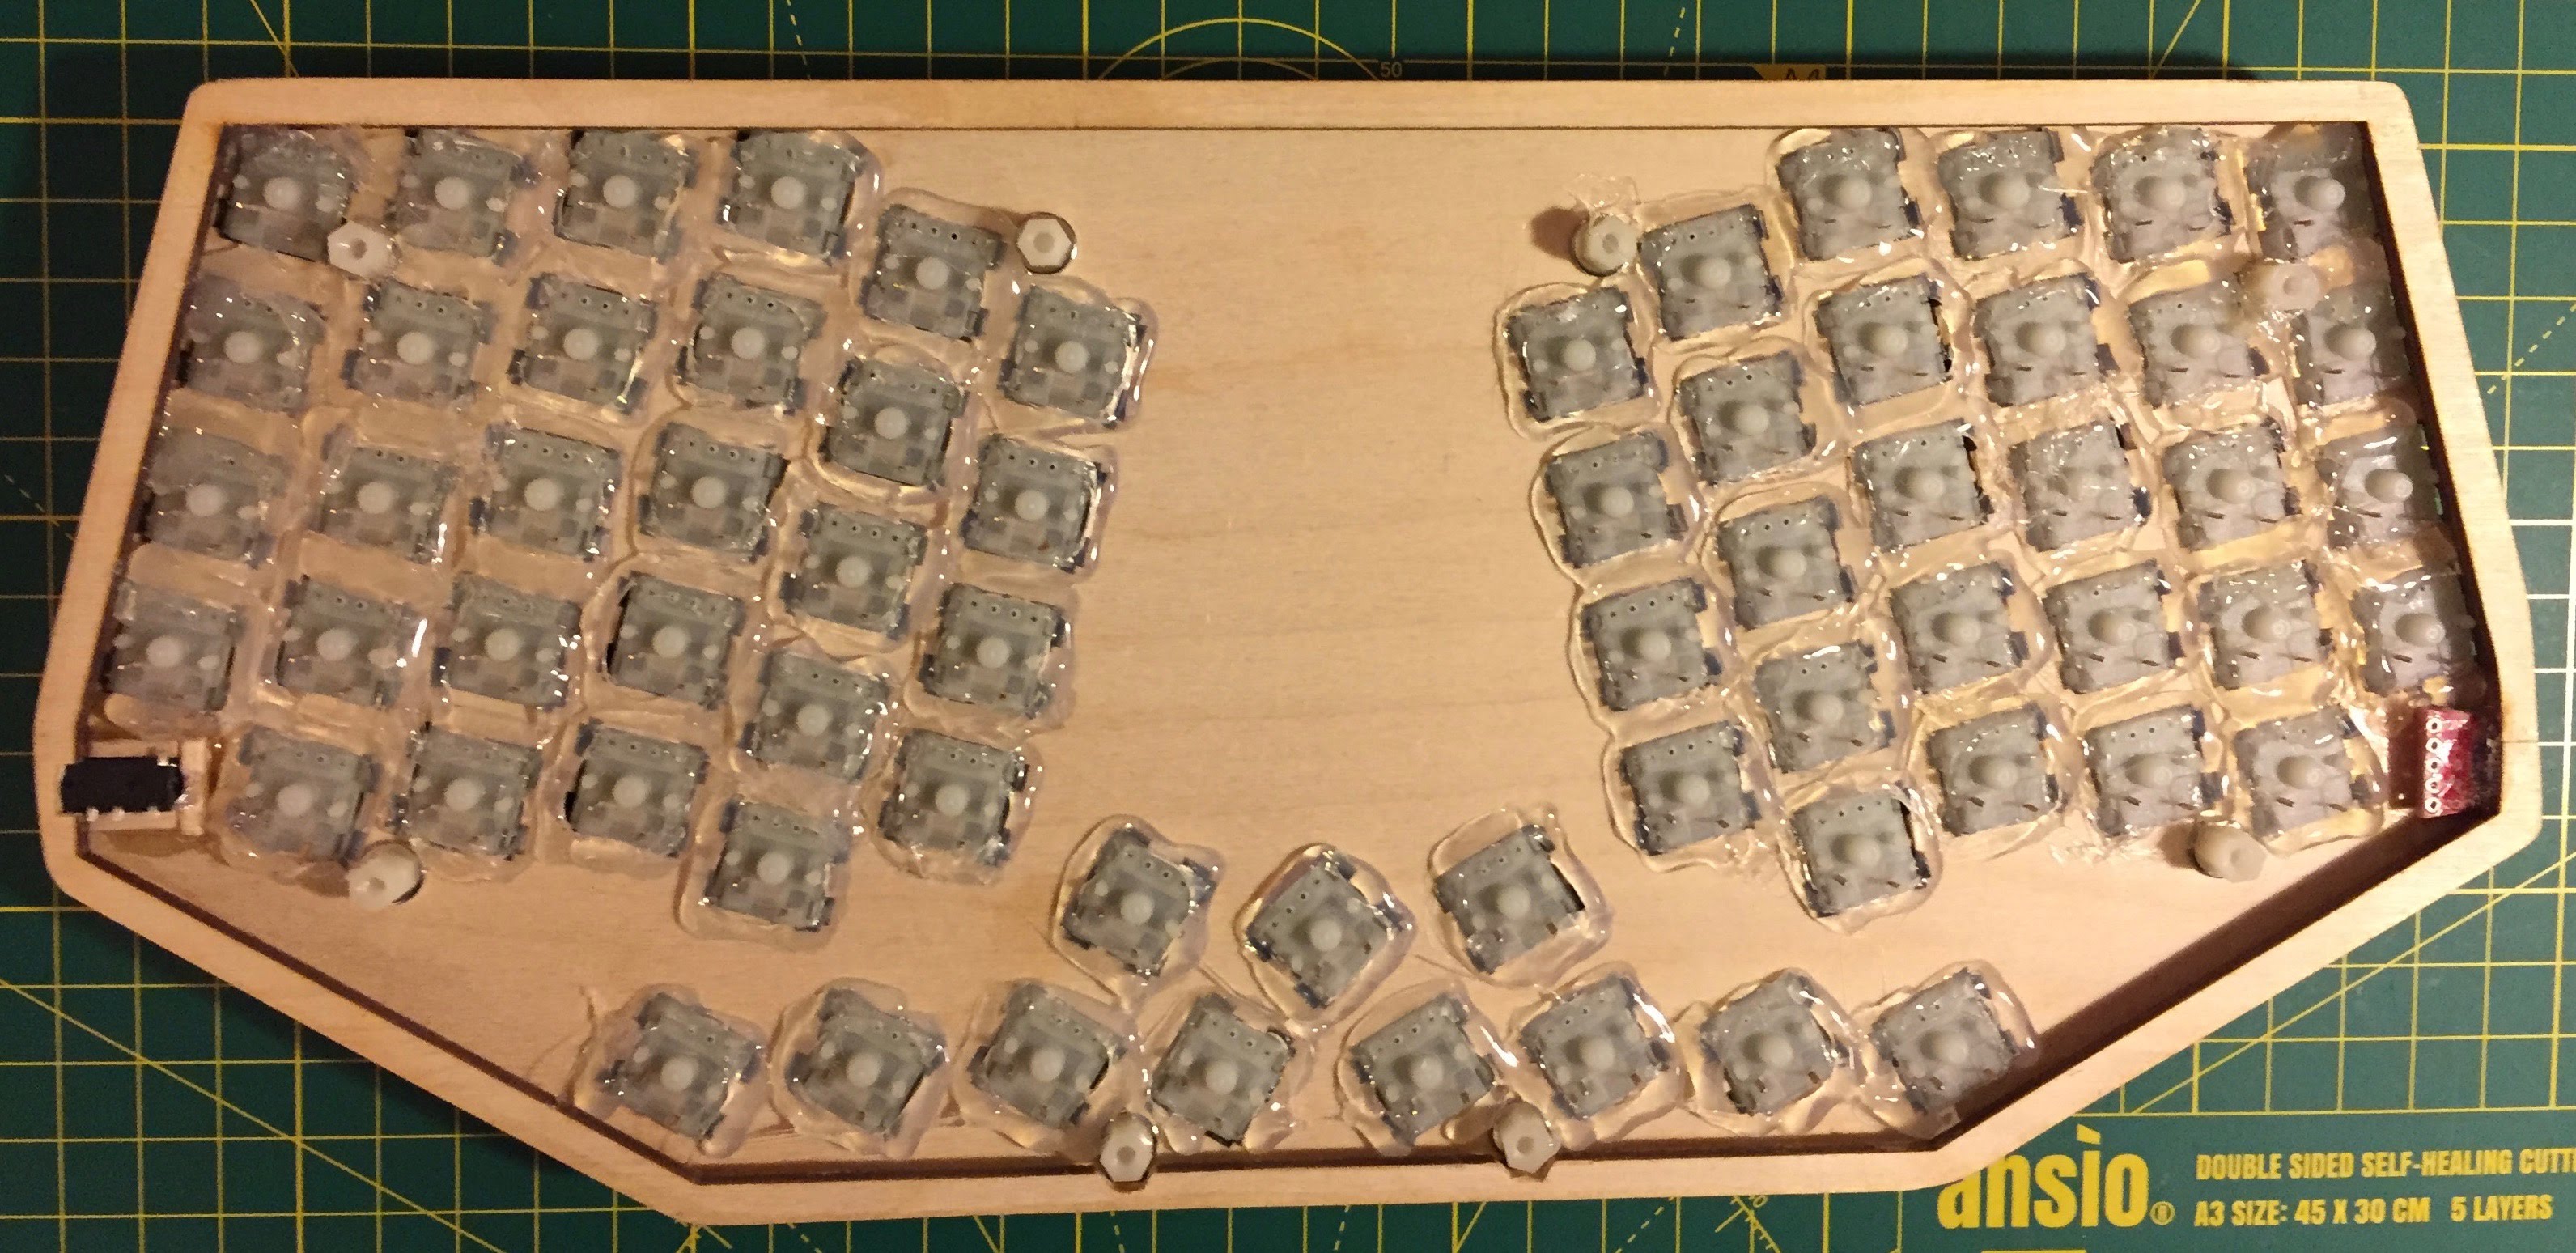
This is the underside after gluing the keys in with a hot glue gun. You can also see the USB and audio connectors epoxied into the corners.
The keyboard has no PCB - just a load of air-wires between the switches. The anode of the diodes are soldered to each of the switches and all the cathodes in a row are soldered together. I tried to emulate the neat soldering of Matt3o’s Brown Fox keyboard - but don’t even come close.
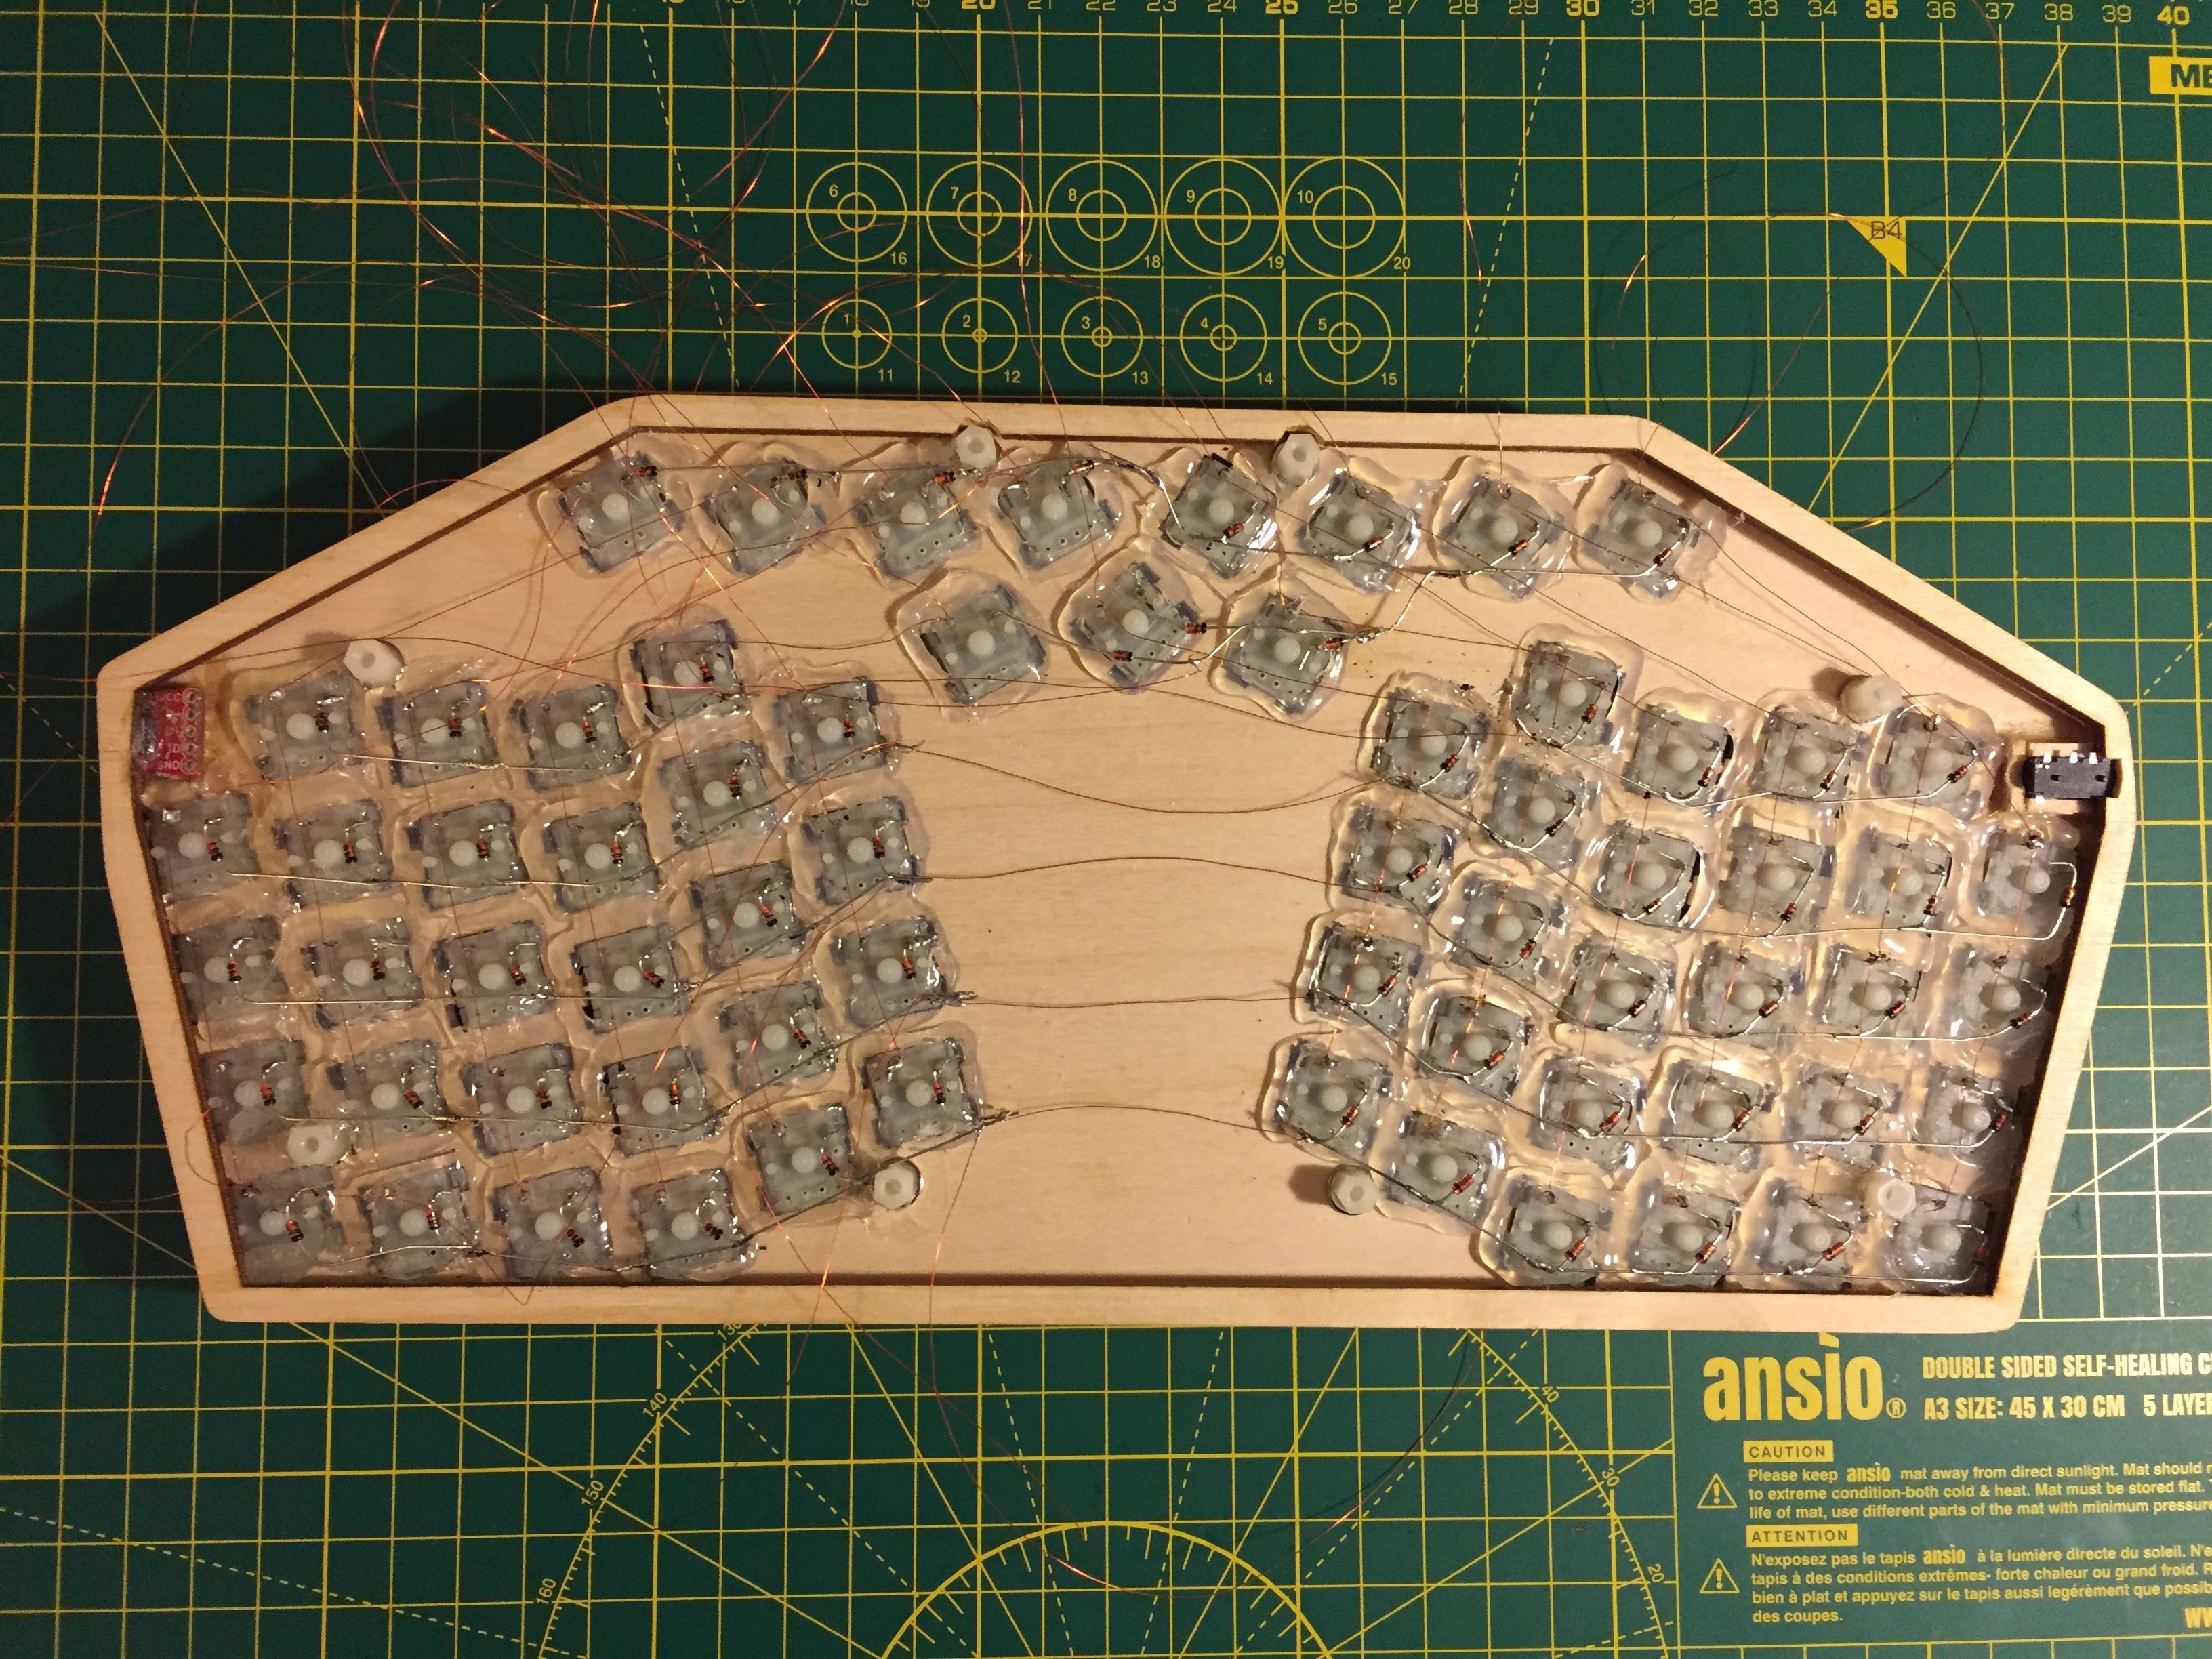
Some people use rainbow ribbon cable for the columns so that each column is colour coded. But I find it very hard to strip the wire at regular intervals so I use enamelled wire (normally used for winding motors and inductors) - if you heat the wire, the enamel just burns off.
The only trouble with the enamel wire is that it is hard to tell all the wires apart when it comes time to solder the micro controller into the matrix.
The micro controller I use is the Teensy 3.1 which is really, really small and has a USB stack. There are lots of other micro controllers out there - but how could I resist an ARM microcontroller?
If you look closely, you will notice that the audio port is not soldered in yet. I am still trying to decide whether to use this connector for speaker/microphone or as an i2c port. But the micro controller I am using puts its i2c interface on different pins from the DAC so, once I solder it in, I am committed. So, since I don’t currently need either, I will just leave it blank for a bit.
All that was left now was to assemble it and plug it in.
Well, not quite, I had to take it apart again to reverse the diode that I had installed the wrong way round and to fix a few dry joints.
Firmware
(like I wasn’t going to write my own anyway :-).
The firmware is a classic Arduino structure - some initialisation code and an infinite loop that scans the keyboard, debounces the keys, interprets the keys and sends changes to the USB port. Some day, I will rewrite it to be interrupt driven so that is sleeps when no keys are pressed. But I am saving that for when I find a way to measure the power consumption.
Since the original keyboard had so few keys, the firmware has lots of funky features like keys that behave differently if you tap them or if you hold them down and then press another key. I don’t need any of that complexity in the new keyboard - but I haven’t got round to removing/disabling the tapping support yet. In fact, all I have done so far is add a single keyboard map and added a software fix for the fact that some of the column wires had been swapped while I was soldering it.
The code is on github.
Evaluation
So, is the second keyboard any better than the first?
- As with the first keyboard, the column-based layout is much better for touch-typing.
- The extra thumb keys are a big win - I have easy access to space/enter/delete and command/control are not much of a stretch. I haven’t quite decided what the outermost thumb keys are for yet - probably function or numlock?
- The extra pinky keys are also great - the escape and tab keys are right where vim users want them and the shift/-/+ keys are where they ought to be.
- The increased angle between the clusters is definitely better. (If there was space, an even bigger angle would be better yet - but I couldn’t make the angle greater without encroaching on the touchpad.)
- There are no LEDs to indicate if caps-lock is engaged or whether it is in hardware-Dvorak, software-Dvorak or Qwerty mode. This doesn’t matter yet because I have not put caps-lock into the keyboard map and I only have a software-Dvorak layer programmed at the moment. But, the great thing about building your own keyboard is that you can customise it however you like. I could drill some tiny holes and add some LEDs. Or I could add a little OLED screen into the space between the keyboard clusters.
- The only bad thing I have found so far is that the keyboard goes right up to the screen so it is hard to see the very bottom line of the screen. If this annoys me enough I will cut a new bottom plate with the keyboard slots a few mm further up which would push the keyboard a bit further away from the screen. If this covers too much of the touchpad I could sand the front-bottom edge to recover the top of it.
So I can touch-type on it without getting discombobulated every time I need punctuation or a number or upper case or all the other things that were difficult on the first keyboard.
And I think it looks great!
The opinions expressed are my own views and not my employer's.